
What is “Niche Farming”?
It is dedicating a part of the farm to a small, specialized market. Because niche farming is highly specific, it can be the perfect fit for small farms and homesteads. Small farms and homesteads typically have one very obvious thing in common – the amount of land they encompass is limited, and generally under 50 acres, with most small farms and homesteads averaging between 10 and 20 acres. It is hard to dedicate a small farm to one product unless that product does not require much land for its propagation and maintenance which limits the available products tremendously. Why is Niche Farming a good option for small farmers? It allows you to use as much of your land as possible. Example:
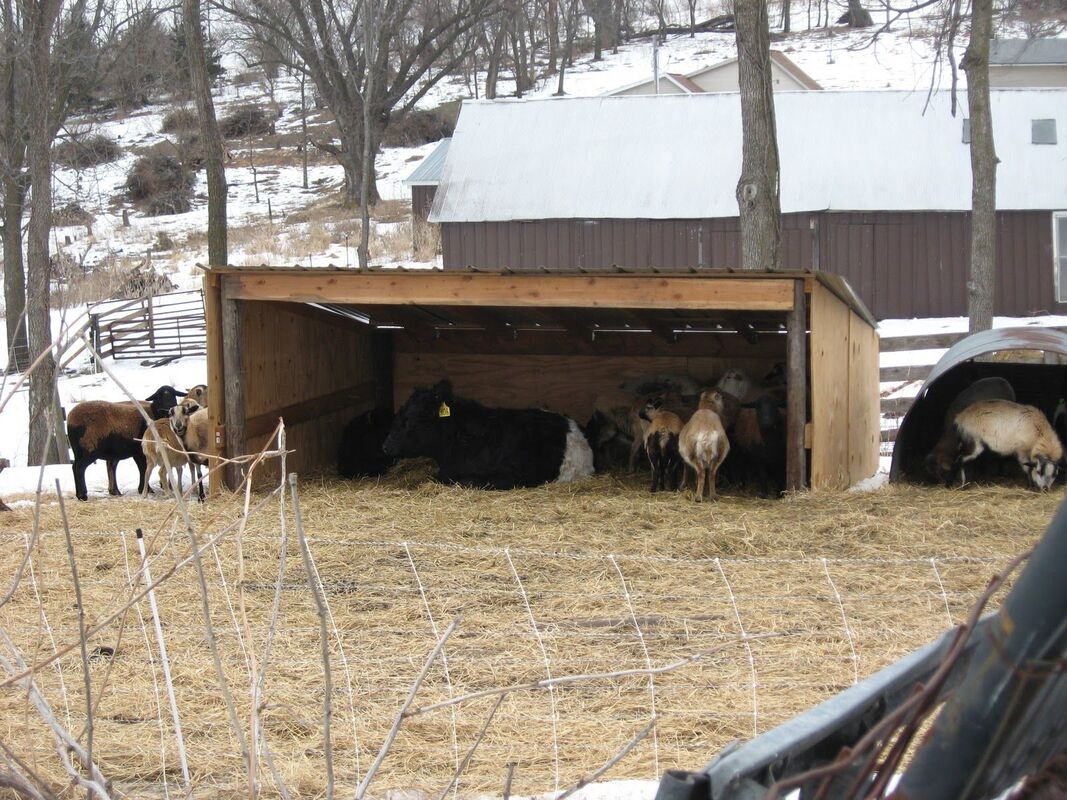
Farmer can stop here and be done and say, “I’m a sheep farmer” and leave it at that or, Farmer can look into how to use the 2.5 wooded acres that the sheep aren’t really going to mess with. There are two front runners when it comes to wooded land: 1. Goats; and 2. Pigs/hogs. Both pigs/hogs and goats will do well with sheep and both will make prime use of wooded land. Solid fences are needed for any livestock so there would be no additional fencing requirements if Farmer added goats or pigs. And, sheep, goats and pigs all require a dry, covered area to get out of the elements and to give birth so, again, no special requirements. Adding goats would have the possibility of opening up several niche markets – dairy, meat and hair – depending on the type of goat chosen. For pigs, pasture-raised pork is in high demand.
a. Get the 4 chickens Farmer needs and call it a day; b. Expand the shed so that it will hold more chickens and raise chickens to market for meat; c. Get 20 pullets and have a good amount of eggs to sell with the rest of the meat products. Don’t forget to put the land to further use and free range the chickens. No need for a large feed bill when the chickens can feed themselves off the land.
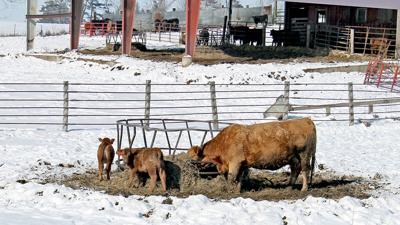
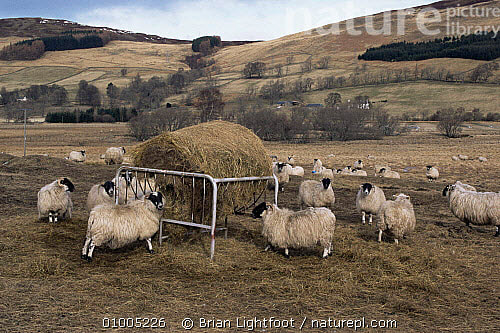
In this scenario the farmer started off with sheep which meant that 2.5 acres of the farm would be productive. The farmer then added goats making an additional 2.5 acres of the farm productive. Chickens, apples and bees were then added increasing the productively of the 5 acres three-fold. Niche Farming works for small farms and homesteads because the amount of product produced is on a smaller – local scale. For instance, from our example above the farmer would produce about 9 lambs a season, 8 to 16 goats a year (depending on how many kiddings; goat load per acre is 6-8; and does usually have twins), around 128 dozen eggs from 16 chickens, about 1,600 apples per year (80 per tree) and somewhere between 40 and 120 pounds of honey per year. Remember: this example is just for a 5 acre production area. If the same farmer decided to transform the wooded area into pasture so that there was 5 acres in open pasture and said, “I’m just going to be a sheep farmer”, that farmer could expect to put somewhere around 20 ewes and a ram on the land and have around 20 lambs for the market each year. If the farmer is marketing at the local farmer’s market, in the “just sheep” scenario when those 20 lambs are sold, this farmer’s selling season is over. In the Niche Farming scenario, the farmer has lamb, goat, maybe some mutton, eggs, apples and apple products and honey and honey products to sell. That is a full season of products at the farmer’s market. To sum up this introduction to Niche Farming, the goals for Niche Farming are to make the land as productive as it can be and to produce products for as long as possible throughout the year (year-round would, of course, be ideal). 

0 Comments
1. Mulch
Add a thick layer of mulch, compost, leaves or whatever you use to your vegetable and flower beds to over-winter the beds and keep any perennials in the beds from freezing. 
2. Earthwork
Finish any earthwork (ex: digging post holes) you need for the winter before the ground freezes. 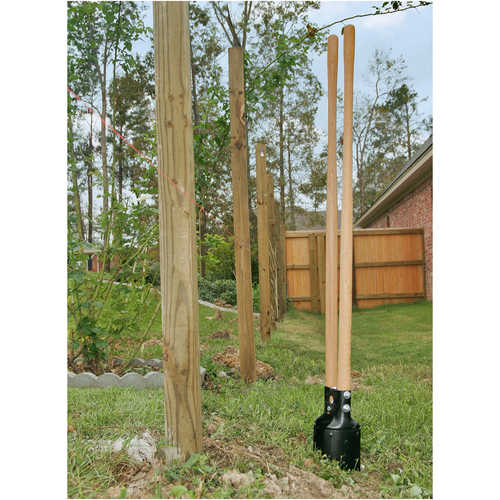
3. Shelters
Check animal shelters to make sure they are in good repair and ready for winter use.
4. Wrap-up Outdoor Gardening, Ramp-up the Greenhouse
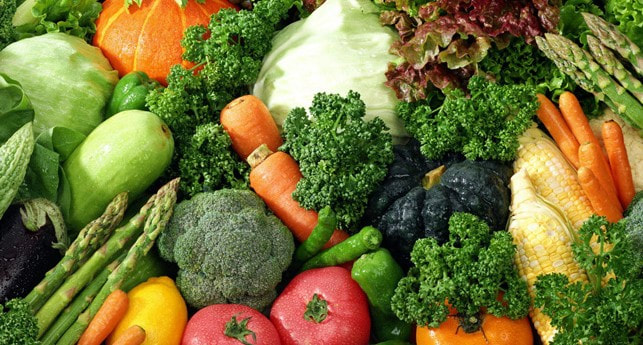
Finish harvesting your fall veggies, prune your fruits and flowers and get sensitive plants indoors. Get the greenhouse ready for duty.
5. Firewood
If you use a fireplace or woodstove, fall is a great time to collect firewood for next year and to make sure you existing stack is in good order and ready for use. 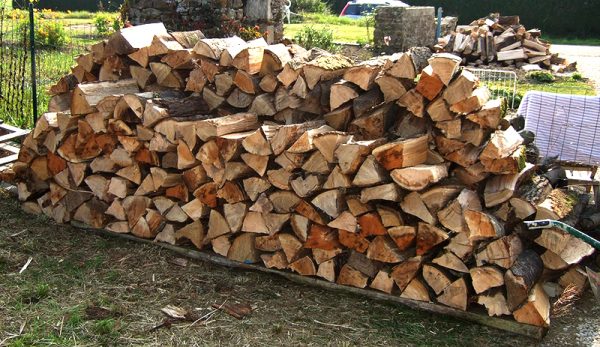
6. Livestock
Make sure you have what your livestock will need to get through the lean months. It’s never good to get to February and learn your hay man is out of hay. Figure out what your livestock’s requirements will be over the winter and solidify your plan to meet those requirements.
7. Clean
Spring, Summer and Fall are busy, things get dirty and disorganized. Now is the time to clean up. You won’t be using most of your tools and equipment over the winter so put them back where they’re supposed to be and where I’m sure they haven’t been since last winter. This is a good time to check the condition of tools and equipment to see if any repairs need to be made or new items purchased. 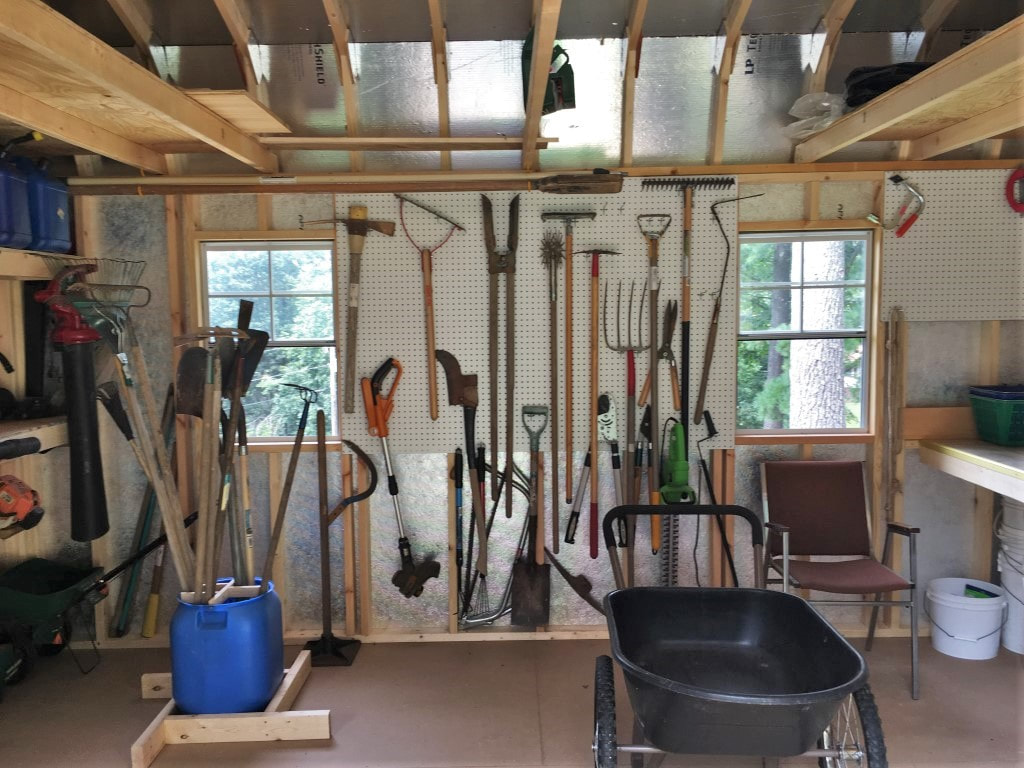
8. Winterize Equipment
If you have any equipment (mowers, augers, weed eaters, etc.) that you won’t be using over winter make sure you drain the gas or add a fuel stabilizer. 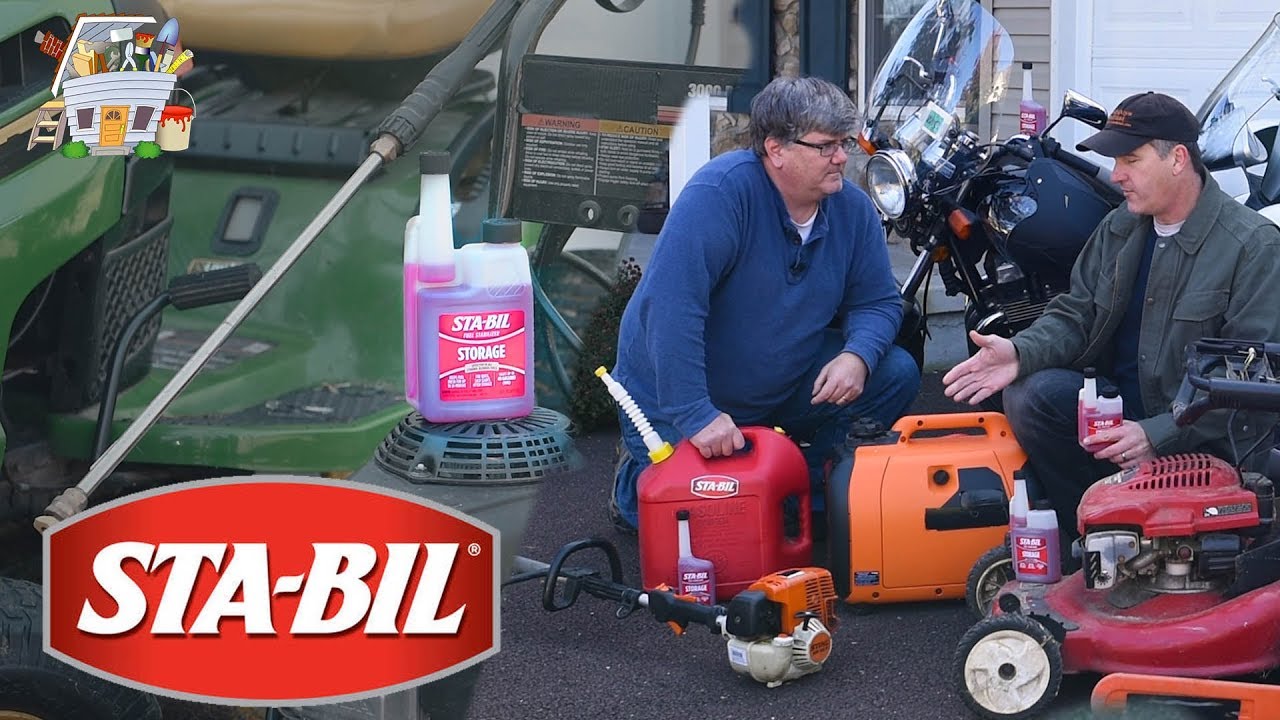
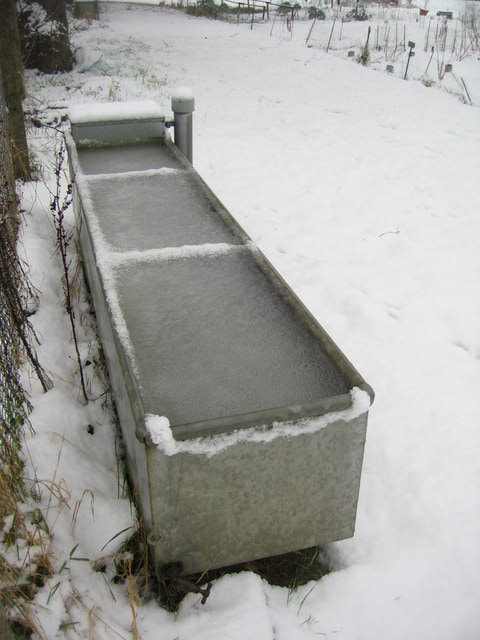
9. Water
Have a plan ready for frozen buckets and waterhoses/pipes. Do you have a tank heater? Are you going to carry buckets from the spigot to the field?
10. Warmth
Now is the time to gather your warm clothes. Don’t wait until its 30° in the morning. 
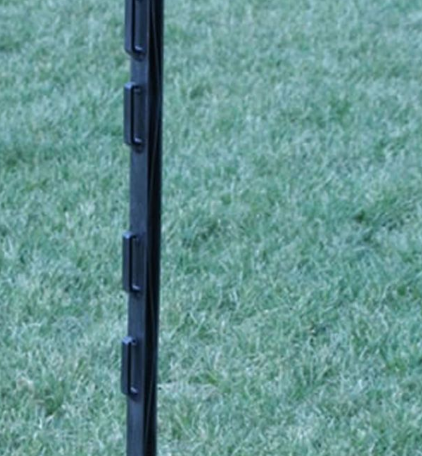
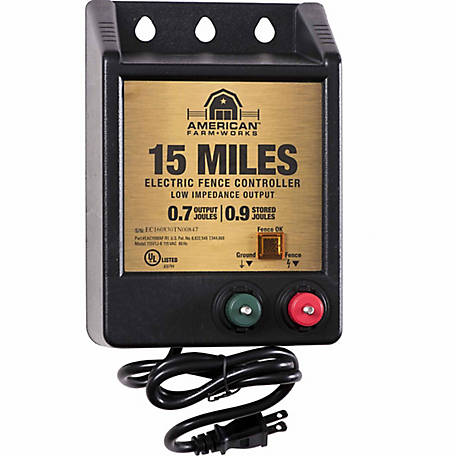
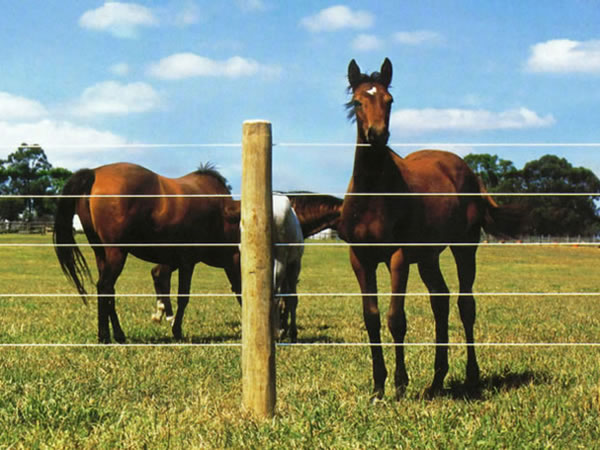
When I purchased my farm there were no fences. I have horses I need fences. I wasn’t deterred by the lack of fencing. I thought, “How expensive and hard can this be?” If only I had known. I would have still purchased my farm but I would have at least been better prepared. There are, of course, a myriad of different fencing options. This article is not meant to be a rundown of all the options, it is meant to tell you how you can build a fence without going broke. Option 1. Electric fencing. This may be the cheapest form of fencing. It is my least favorite and I will not use it for anything other than temporary fence, however, it is cheap with fiberglass posts costing $2 or less and “T” posts running between $5 and $7 dollars. A 2,640 foot role of electric fence wire costs about $50 and a 15 mile electric fence charger costs about $75.
Option 2. Polyrope fencing. This is the fencing I went with initially. Yes, it is a type of electric fence, however, if you get the thicker rope you don’t have to electrify the fence. One of the things that really drew me in is the fact that it said you only needed posts every 50 feet. This was amazing considering the cost of wood. I used 6x6” posts for the corners and gate with 4x4” posts as braces and then landscape timbers for the line posts. I did not concrete any of the posts in the ground. I wanted the option of moving the fence in the future. I used the ElectroBraid Checkered horse fence polyrope from Tractor Supply. It is sold in 1,000 foot rolls for $179.99 a roll. I needed 2 rolls (3 rails). This fence worked well for a little while and then as the horses pushed on it, insulators broke and because the posts were so far apart, the lines sagged and it was a mess at times.
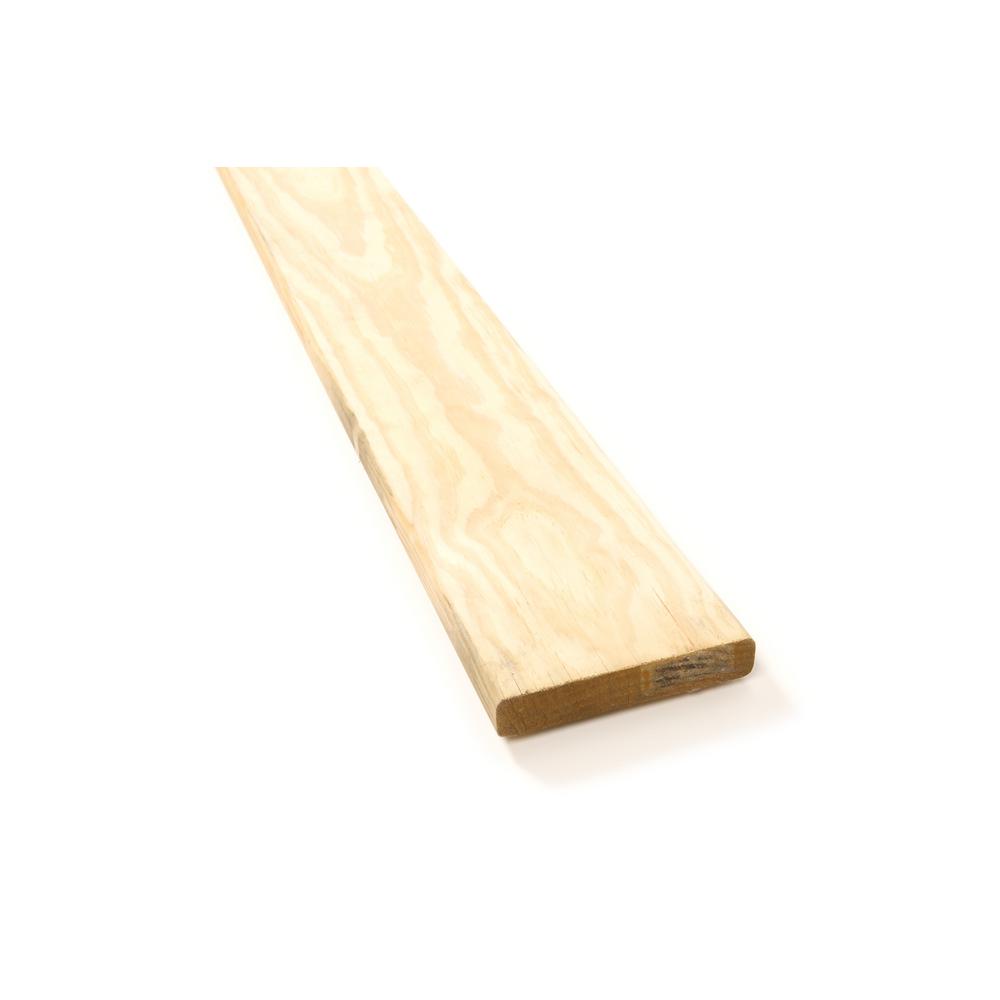
Option 3. Post and rail. This is my go-to fence. To me, it is just seems so much more solid and secure. I decided to split the one large paddock into smaller paddocks. When I did this I went around the perimeter of the paddock and added wooden posts every 7.5 feet. Then I put insulators on the posts and attached the polyrope to the new posts. This gave the polyrope a lot more stability so it acts almost like the wooden fence, though the horses still take advantage of it. I started with each paddock making the interior fencing post and rail. Eventually I will put rails up on the perimeter but for now the polyrope is working. Wood is the most expensive part of the fence. Yes this is so obvious it should hit you in the forehead. I knew going in that wood was expensive, I just didn’t know how expensive it was. And that’s when I decided to use landscape timbers for posts. Ground rated 4x4s cost between $7 and $8 versus a landscape timber at $3.77. I just put up a section of fence and used 25 posts. It would have cost $175 for 4x4s. It cost $94.25 for landscape timbers. The drawbacks are two-fold: 1) landscape timbers are not as sturdy as 4x4s; and 2) landscape timbers are not ground rated so they are going to rot. It will take 5 or so years for the landscape timbers to rot. The plan is to gradually replace them with 4x4s over time. For rails I use 5/8” deckboards which cost $3.77 each. The deckboards are treated so they should not rot. I use 2 rails per post. I have left room to put up a 3rd rail if needed. This is, of course, much more expense than using polyrope, however, it is more secure so to me, the trade-off is worth it.
You also need to be honest with yourself about your ability to build the fence. For example, I knew I wasn’t going to put up field fencing because I wasn’t confident in my ability to do it right and I knew it would take longer for me to figure it out than to go with another type of fence. 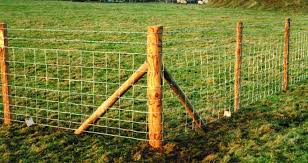 The trade-off is really what it comes down to when building fence on a budget. You have to decide what kind of fence you want and if you can afford it, if not, what can you afford and is the trade-off between the two worth it. For example: using landscape timbers knowing I would need to replace them in a few years was worth saving the money (because I didn’t have the money) over using 4x4s and not having to replace them. Using wooden rails was worth the expense over using polyrope because of the security it brings. Fencing is necessary with livestock, there are many options – I have only talked about 3 of the cheaper ones– spend time to research, see what fits your budget and your tastes and your ability to build it – don’t go broke putting put fence – there are so many other needs for your money – like grain and hay. 
It’s a brave new world for the female farmer. It has traditionally been accepted that farming is a male dominated career. I think that is a misnomer. I think there have always been women farmers in great numbers but they have traditionally been married to male farmers and it’s the male farmers that are the “visible” farmers, they are going to the feed and seed stores, they are talking to the dealers, they are attending the auctions, they are dealing with the Ag agencies, etc. Not that their wife isn’t right by their side. So what has changed?
What we are seeing now is menless women taking on the world of farming; young women who are not yet married and older, single ladies who are starting a second career or a first career after being a homemaker. In fact, in the 2017 census (the last census) 56% of farms had a female producer and in 38% of that 56% the female producer was the primary producer. Being the primary producer means they make most or all of the day-to-day decisions for the farm. Female farmers are becoming a force to be listened to and respected in the farming world although there is still quite a bit of discrimination which is expected in any field in which women have not traditionally taken a leading role. In the 2017 census the majority of women farmers were involved in the beef cattle industry (28.9%) with the second most being involved in other crop farming with the majority involved in row crop and hay production (19.8%). Third on the list was aquaculture (13%) and fourth was oil seed/grain farming (10%). The census also showed that most of the farms ranged from 10-49 acres; that most women had “off farm” jobs as well and that the average age was 58 years old. 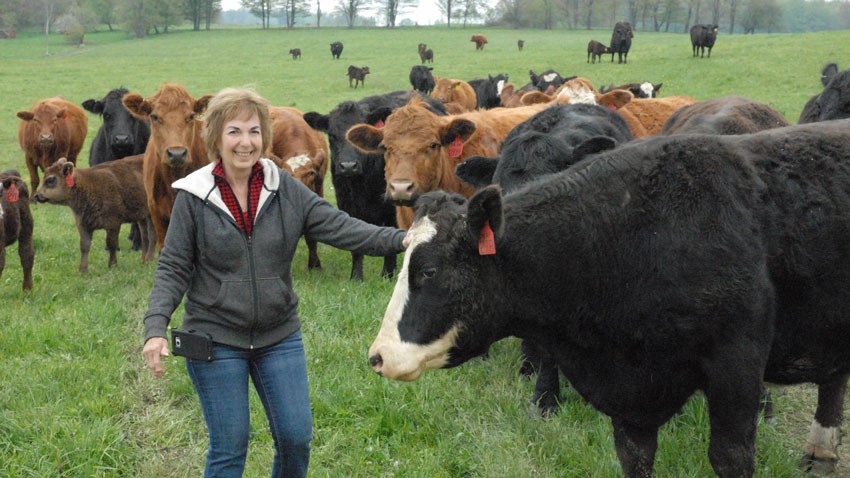
A couple of things about the census are surprising:
1. Beef cattle was the #1 industry for women; 2. 10-49 acres was the size of the majority of farms; 3. 58 year old was the average age. Surprising or not, this gives an overview of what women farmers are up to. It appears that women farmers are taking the small farm business model to heart. Which makes sense as 10-49 acres is a manageable size for one or two people to work. It is not hard to envision these women farmers selling their pasture fed beef at the local farmer’s markets, to farm-to-table restaurants and local grocers. It also appears a reasonable inference that older women believe the small farm model to be a good retirement income and so, they are investing in the land and the business while continuing to work off farm until retirement. 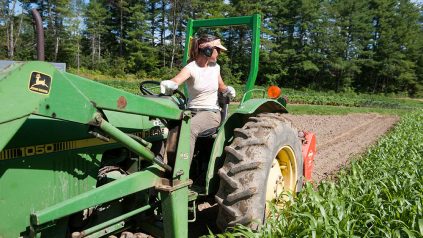
What does the mean for a woman who wants to get into farming?
Most importantly it means that the path is becoming a little less rocky for women farmers. As a new farmer, there are also steps you can take to make the road even smoother. 1. Education – This does not mean you have to go back to college and get a degree – you can and that would not be a waste of time – there are so many programs offered a community colleges and State agricultural cooperatives not to mean local club workshops that it is not difficult now days to become educated in the area of farming that you are interested in. The internet is a wonderful resource as well – most universities post research papers online, you can find online courses and you can pretty much find anything on Youtube. 2. Knowledge – Whether you are dealing with the Bank, the Government or the local feed and seed store you need to know what you are talking about. Books and articles are always my go-to for information - of course you can find almost anything on the internet as well but make sure the source is trustworthy (there is a lot of BS on the internet). The point is when you talk to someone in your industry you need to know what you are talking about if you want someone to take you seriously. This means keeping up on the current news in your industry as well. You can never stop learning. 3. Financial Assistance - There are a lot of financial resources for new farmers and minority farmers (includes women). There are grants and loans you may qualify for. It takes time to find these and to research them but it can be well worth the time. 4. Sweat equity – I love this little coin from the DIY shows. It is true – you are going to have to get out there and get your hands dirty – A lot of farming is trial and error so the sweat equity that you put into your farm is going to be priceless. 5. Connections – Get to know your feed and seed dealer, your banker, other farmers in your niche, your clientele. At the end of the day, you are selling a product, connections – networking – may be the difference in being in the red or the black. 6. Agricultural Cooperative – At the very least join your local agricultural cooperatives email/newsletter list – my cooperative has a plethora of information in its website about all facets of farming – the cooperative also hosts workshops, conventions, meetings, shows, etc. This is another connection/networking opportunity but also an educational outlet as well. 7. Research – This could go with education or knowledge but I am specifically referring to researching what you put on your farm. If you are investing in livestock – do the research – make sure the type of animal, the breed of that animal is going to mesh with your farm’s set-up and with you – research breeders – make sure you get the best breed stock you can afford from reputable breeders. If you are purchasing livestock feed or fertilizer or crop seeds – do your research so that when you go to purchase the product you know what you are purchasing and why you are purchasing it. The same holds true with any tool or accessory you purchase for the farm. Most of us aren’t made of money so when we decide to use our hard earned money we want to make sure it is used for the best purpose possible. I am not saying that you should be conceited about what you want to purchase or your knowledge of it, in fact, you should listen well to the experts you are purchasing from, however, if you know what you want and why it will help the experts to make sure you get the product which best serves your purpose (even if it’s not what you initially wanted). For example: I wanted to purchase a zero turn lawnmower to mow my yard and the pasture I was renting at the time. The pasture was on an incline and was terraced. It was used to pasture my horses. I went to a local lawnmower dealer and when I explained my needs the salesman told me I would be much better off to purchase a traditional lawnmower that could handle the uneven terrain and rough mowing much better than a zero turn. I acquiesced and purchased a Husqvarna riding lawnmower; it was the best decision. The Husqvarna is a beast that hasn’t let me down yet. 8. Be Brave – You Can Do It! I finally got my small farm when I was 42 years old. I was out of shape and had done little farm work in years. I use the term farm very liberally. I purchased a house and some land. There was nothing on the land that would make you think it was a farm. My 21 year old daughter moved in with me. Together we put up a 100’ x 200’ paddock. I built a goat pen. We got a chicken coop and fenced in a run. We cleared brush and trees to make paddocks in the woods. With the help of family members we put up a greenhouse. I continued adding fencing to the field using just a post hole digger to dig the holes. As of now (October, 2019) we have four horses, two goats, four chickens and two ducks on the property which now I can properly call a farm. And, all of that, in just 1 year. Needless to say I am in much better physical condition now. The point is, you can do it regardless of age or physical condition. The most important thing you need is the will to do it, the mindset that says it has to be done and I’m the only one here to do it so, I’ll do it. That’s my answer when someone says, “I can’t believe you did that by yourself.” I say, “Well it had to be done and I’m the only one here to do it so I did it.” Trust me, you can do so much more than you think you can and, add to that, all the resources on the internet – there is nothing you can’t do. Women Farmers – We Rock! 


A list of tools needed for the farm or homestead could fill up page after page but, the purpose of this post is to list the 10 essential – must have – tools.
1. Cordless Power Drill – Sure you can use a hand held screwdriver or hand drill but why would you? Invest in a good, strong cordless power drill. The cost can range anywhere from $79 to $300. Be smart and keep an eye out for sales. If you have a favorite brand that’s great, if not, I am partial to DeWalt. I have had the same DeWalt drill for a well over 5 years and have used and abused it on a regular basis. It hasn’t let me down yet. I’ve also heard good things about Kobalt and have seen the circular saw in use but not the drill. 
Don’t forget to get a variety set of drill bits and screwdriver bits. Get at least 2 phillips head bits as I have found they wear out the fastest. If you are like me, you will get hooked on the star-shaped heads and buy screws with those types of head. They go in cleaner and the heads ‘hold’ the screws better so less stripping and wearing of the bit.
2. Hammer – At least 1 good hammer. I have about 8 hammers (they like to walk away). I have different sizes – longer handles, larger heads, etc. 
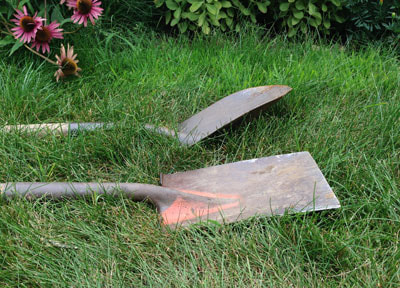
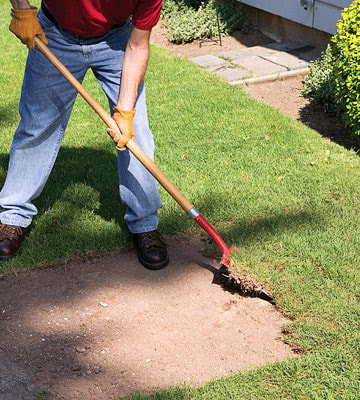
3. Shovel – There are many types of shovels on the market for different types of digging. At the minimum get a round point digging shovel. I would also recommend a flat head shovel. The round point is for digging down into the ground. A flat head shovel is to remove things on the surface. For example: if you wanted to remove grass from an area to set up a garden bed you could take the round point, dig under the sod (grass) and then use the flat head to run under the sod to remove it.
4. Post Hole Digger – Again, there are many types of post hole diggers, the cost varies depending on the type. There are basic 2 shovel, wooden handle diggers, fiberglass handles and metal handles. What I will say about this is try them out in the store, open the handles to see how open the shovels get, feel the weight and durability. I have a one where the handles cross at the shovels. I have had it for years and wore it out. I bent the head of one shovel and stripped the bolt that holds the handles together. I could have replaced the bolt and the shovels but, decided I would just get a new digger. The new digger has straight fiberglass handles. I liked it because it was not overly heavy but had good weight, the shovels were solid and opened well and honestly there was a very limited selection but it has worked well.

5. Bar Digger – This is an absolute must have if you live anywhere with red clay or other extremely hard, compacted soil. This digger was a life saver for me this summer, in fact, I would not have been able to dig many holes without it. Basically is a 6 foot tall piece of solid metal (weighs close to 20 lbs) with a chisel end and a flat top. It is wonderful for breaking through the soil, breaking up rocks and digging rocks out of holes.

6. Handsaw – Get a good handsaw (even if you have a chainsaw). The actual saw is an individual choice, go into the store, pick them up, feel them, grip them, that is the best way to pick out a saw that will be good for you.
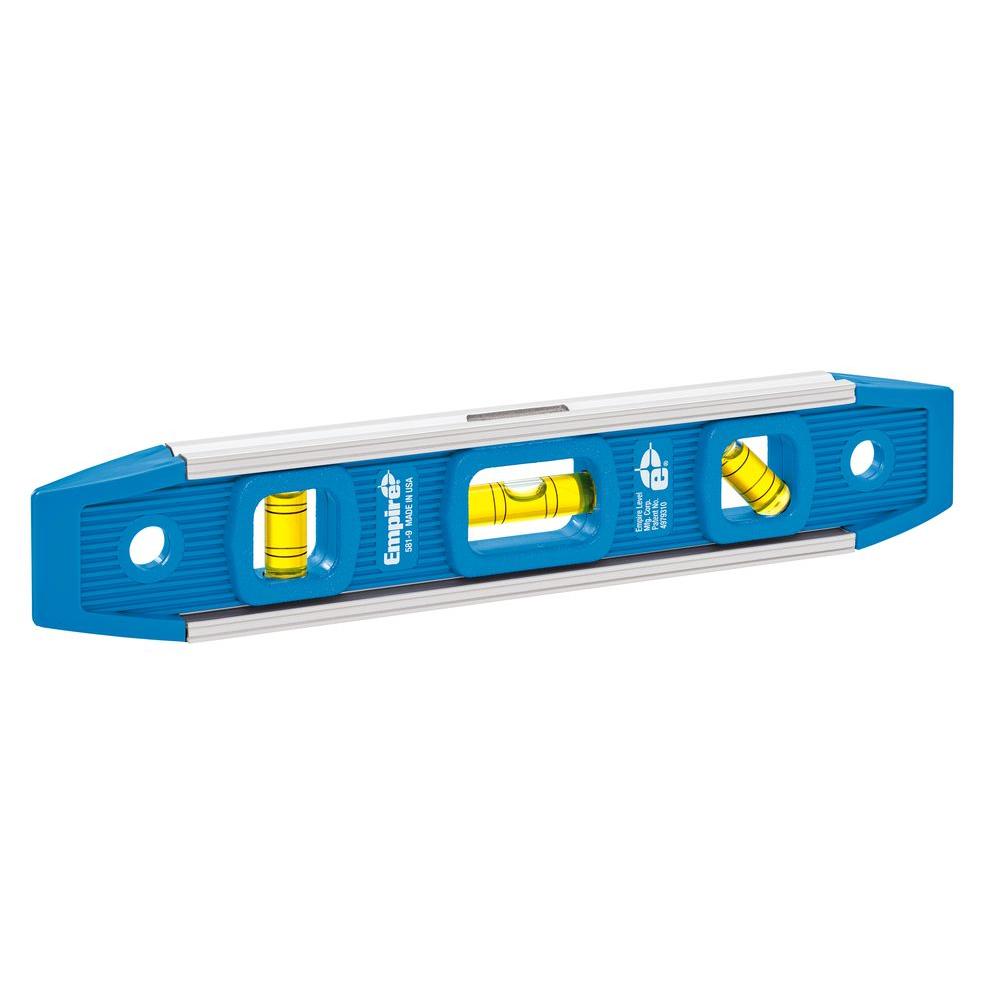
7. Level – You will probably end up with several different kinds of levels but at minimum to start, get a box level or a torpedo level. I use both but the torpedo level can fit in my back pocket so it gets used quite a bit more than the box level.
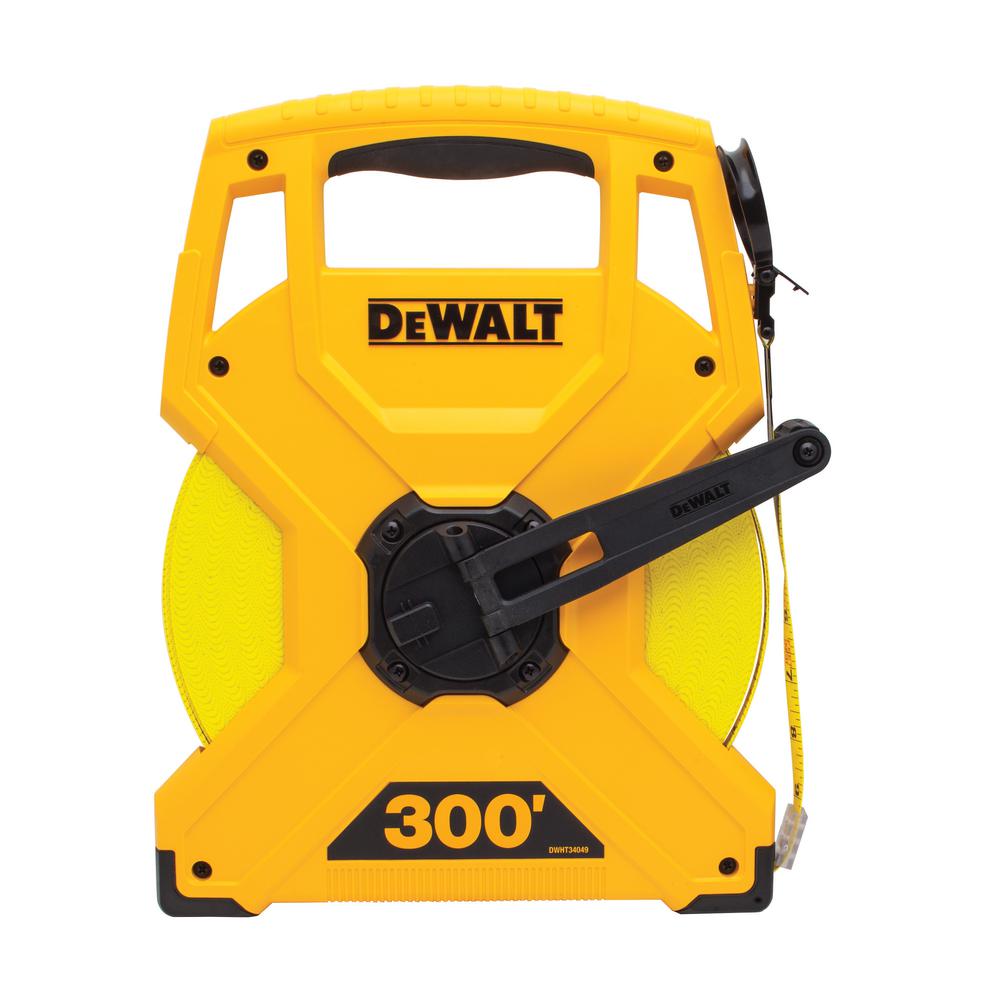
8. Tape Measure – At minimum have a 25 foot retractable tape measure. These also like to walk away so you may end up with several like me but that is not a bad thing as I have different lengths. I also have a roll out measure tape that goes up to 100 feet which works well for measuring fence lines.
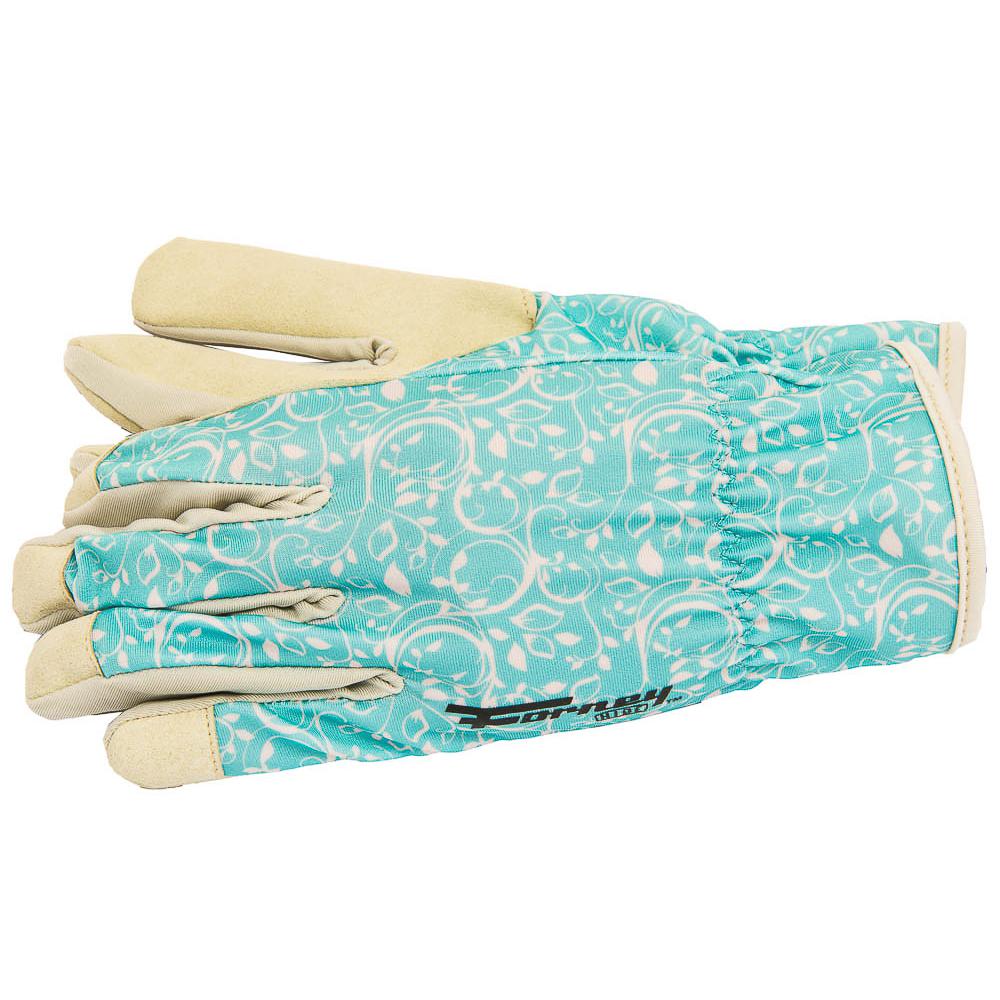
9. Gloves – Absolutely essential. Make the investment in a sturdy pair of gloves. I purchased a pair of heavy duty work gloves in the spring and wore holes in the finger tips by the end of the summer. I also purchased a pair of leather palmed garden/utility gloves. These are heavy duty gloves and are currently pulling double duty as work gloves as well as garden gloves.
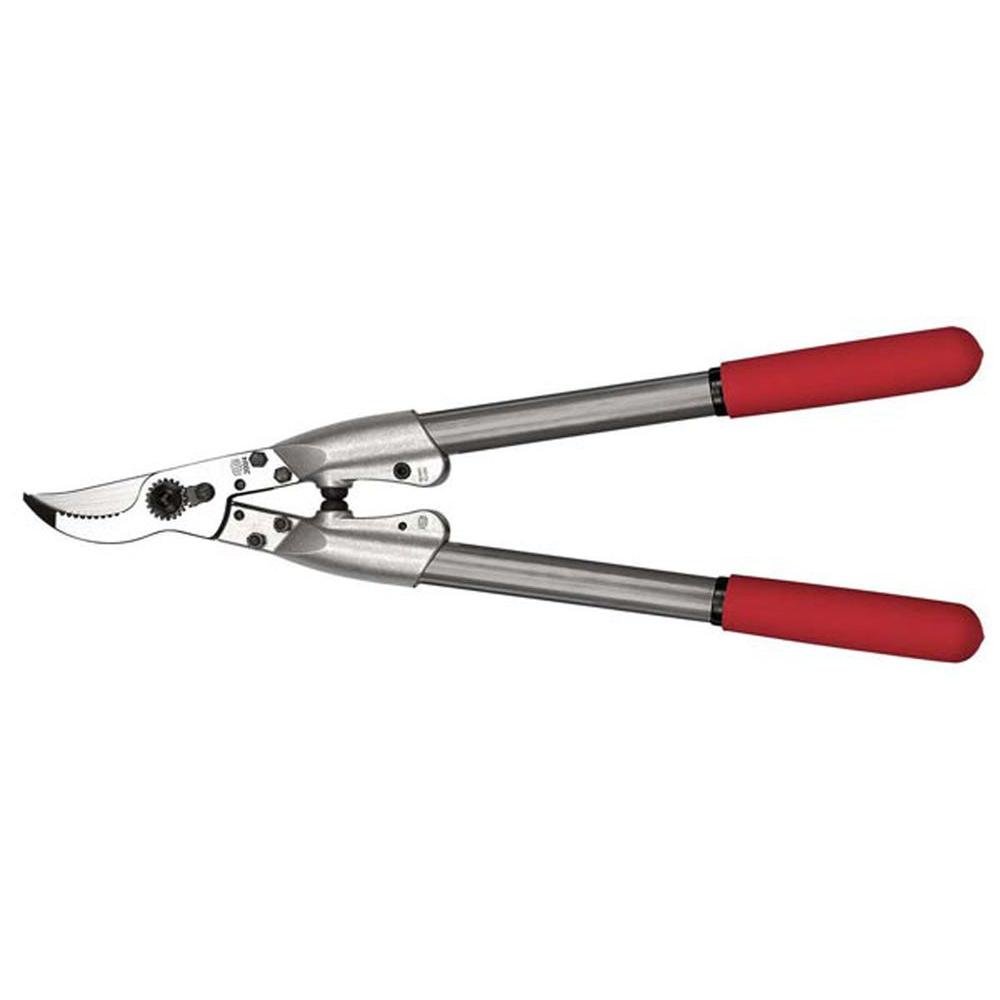
10. Pruning Shears – Sounds a bit strange, I know, but pruning shears have so many uses. They have so many uses, not just to prune plants, trees, vines and other weedy things but cut electric fencing, polyrope fencing and other types of metal or rope and, in a pinch, trim goats’ hooves, etc.
That is my 10 Essentials list, however, there is an 11th that isn’t necessarily essential but if you’re putting in a lot of fence posts will make life easier and your post more secure. That is a simple wooden broom or rake handle. I use this as a tamper to compact the fill dirt in my post holes.

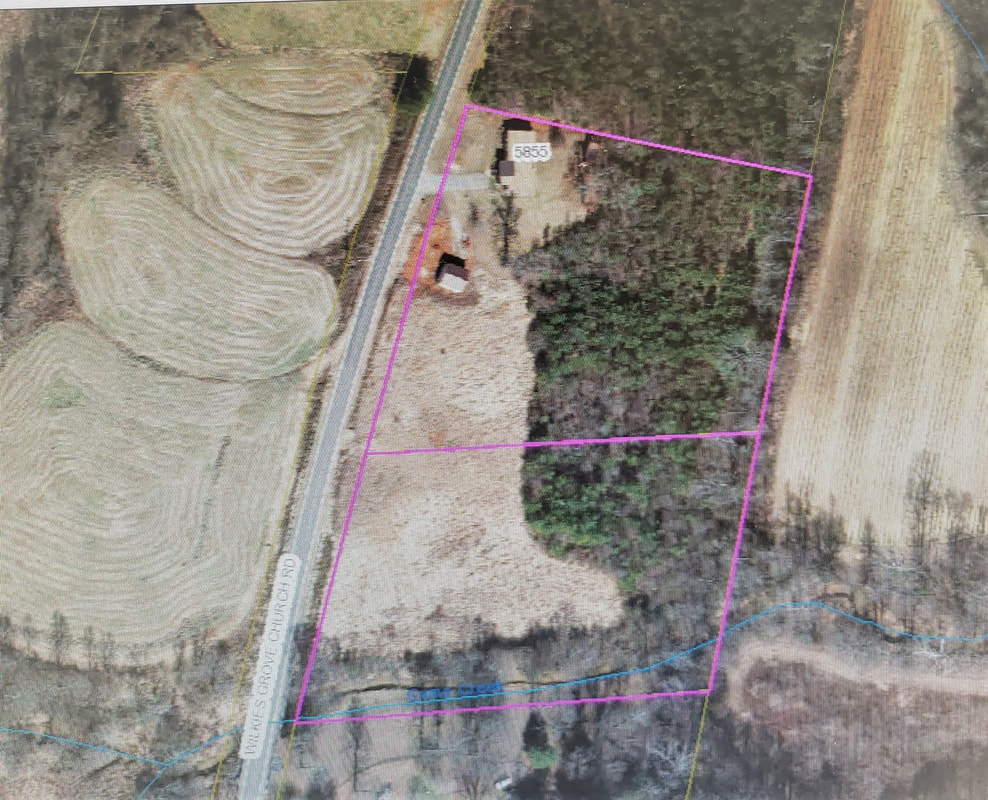
GIS - Geographic Information System – in a basic sense it is a system used to map the geography of certain areas. Many different applications for GIS exist but for this article I am referring specifically to its use by county tax offices. Most counties now use GIS to map their counties, building zones, property owners and property lines, among other things. So, how can this GIS feature assist you, a farmer? PHOTOGRAPHS First, if your county has been using GIS for a while and incorporating photographs, this can provide some extremely helpful information for a new landowner. For example, I purchased my land in 2018. Below is the GIS map of my property in 2018. The pink border is my property line. The blue line is a creek. To the top of the photograph you can see my house and just below that a storage garage. You can see an open area of land that looks like a boot with the remaining acreage in trees. Below is a GIS photograph from 2014 of my property. 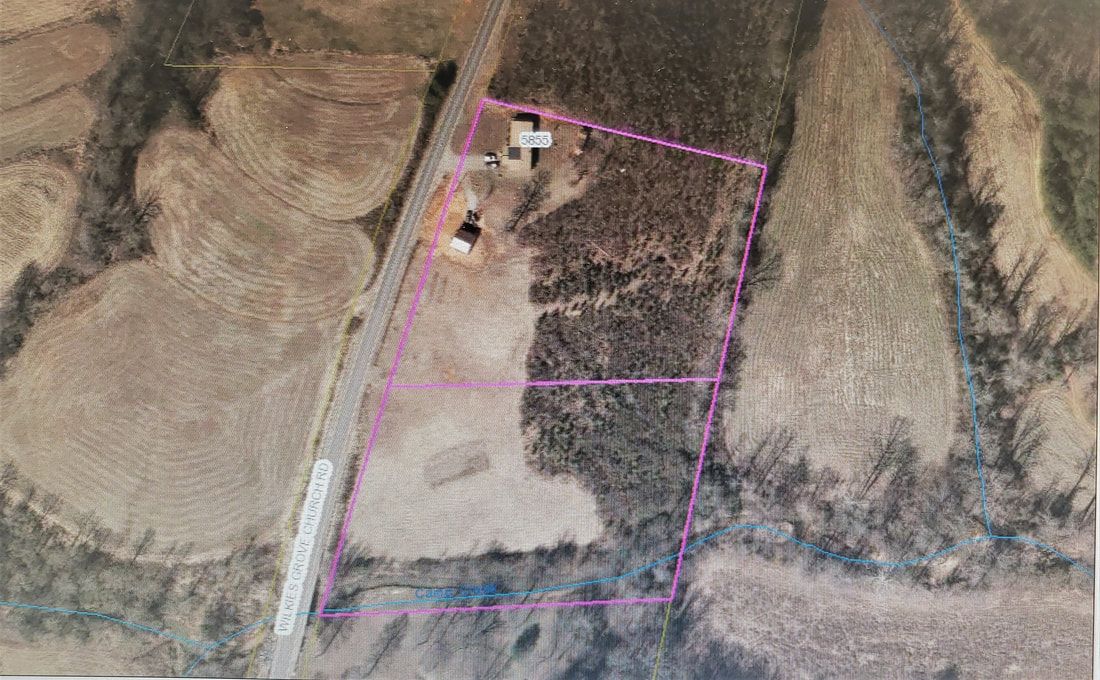
From this photograph you can see a dark rectangle towards the bottom of the ‘boot’ which appears to have been a garden. Also behind the storage garage there appears to be 2-3 dark lines that could also have been vegetable plantings. Also visible in the wooded area about a quarter of the way down the property there appears to be a thin line in the woods, almost like a road or trail.
Below is a GIS photograph from 2010 of my property. 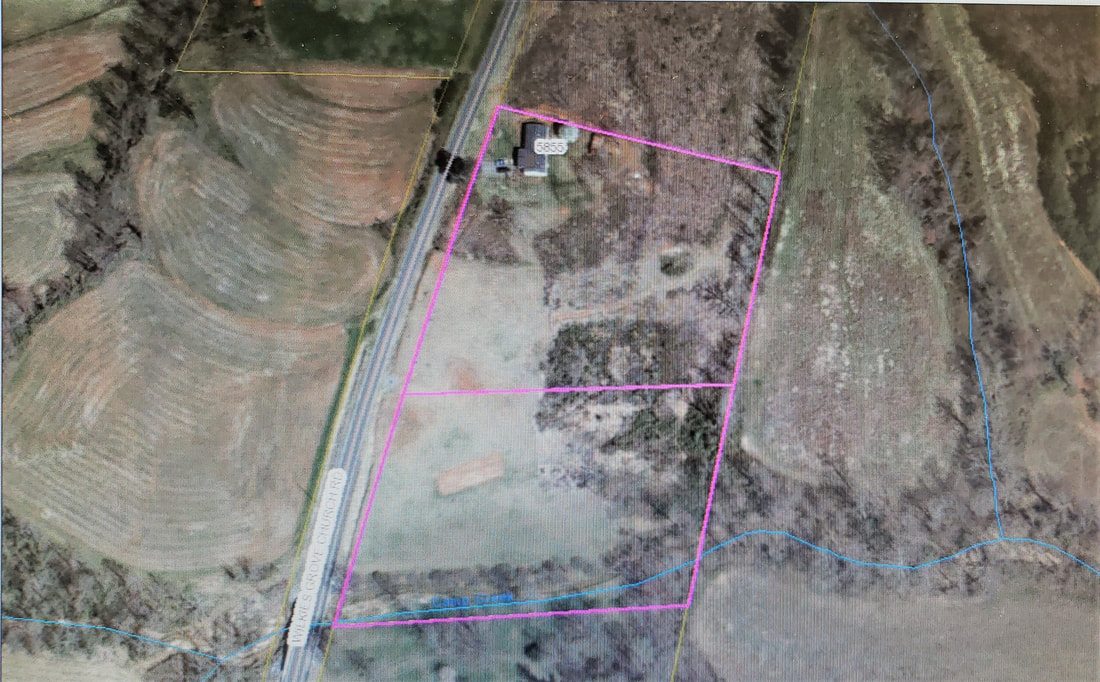
This photograph shows a dramatically different looking property. The storage garage has not been built. There appears to be few, if any trees on the back of the property until about the halfway mark of the property, at that point there is a rectangle patch of woods and it thins out again as you get towards the bottom of the property. It is clear in this picture that there was a garden on the property. A trail is definitely present in the wooded area as well.
Below is a GIS photograph from 2009 of my property. 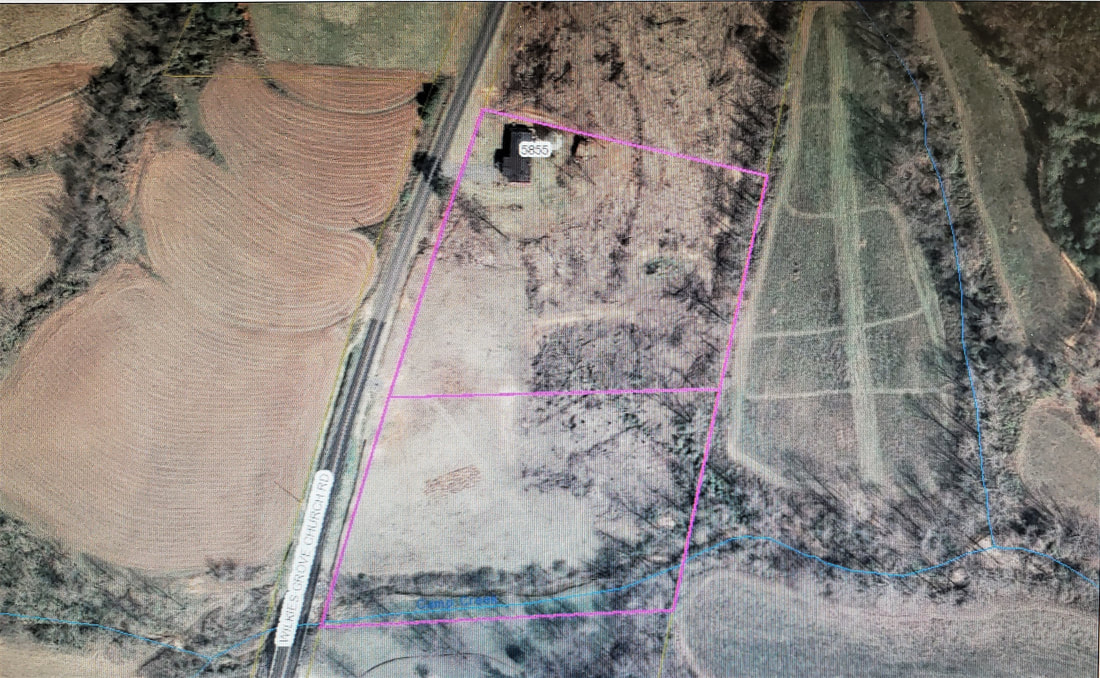
Now we get to the meat. It is clear from this photograph that my property was logged in 2009. From this aerial photograph they seem to have taken all the trees which is confirmed by an on-foot trek in the woods, it is easy to tell that all of the trees are new growth. Knowing this is very helpful to me and one of the reasons I purchased the property. I knew it would be a lot easier for me to clear new growth forest.
Below is a GIS photograph from 2005 of my property. 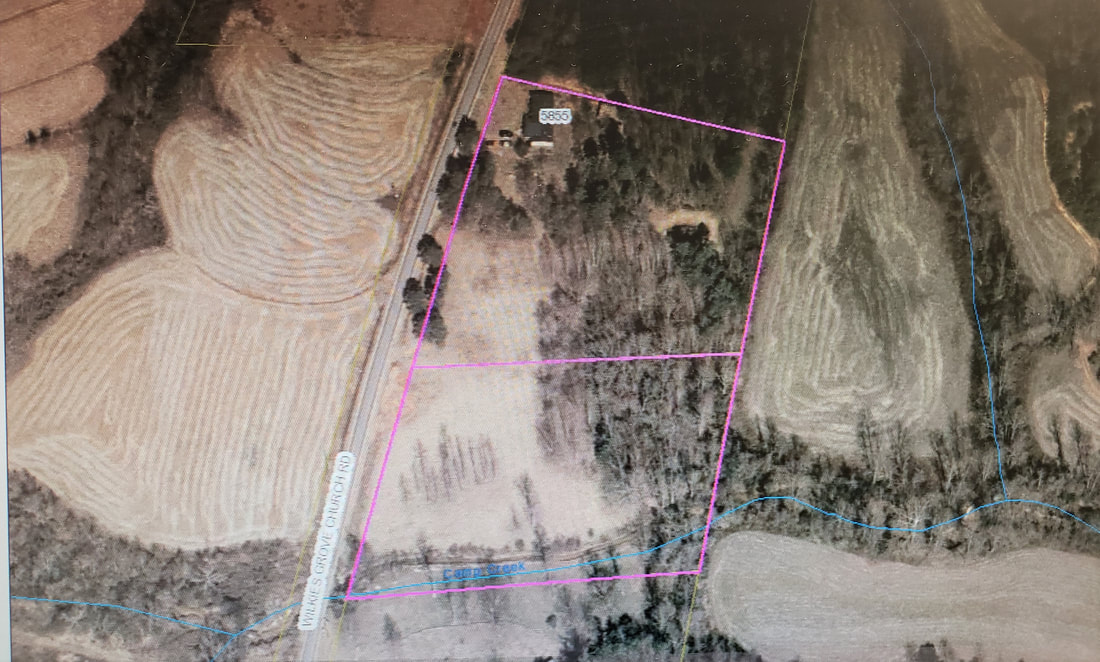
Again, a very different looking property than 2018. One of the main features that stands out is the number of trees located near the road toward the house and the patch of trees in the middle of the open land. None of these trees exist today, at least not as trees. My brother brought his tractor over to bushhog for me. I know he wishes I would have looked at this GIS photograph before (up to that point the 2009 picture was the oldest I had looked at). He caught his bushhog on a stump from one of those very trees up by the road. Fortunately his tractor was not harmed, however, had I had this photograph we could have been more careful in those areas. I mean, who would think a stump would still be around 13 years later right. It is also clear that no trail exists in the woods and no garden in the open area. It does reveal that a clearing did exist about a quarter down from the top of the property toward the back of the property. I have confirmed this on foot as well. Out of pure interest, I find it fascinating how the creek has migrated over the 13 years. There is a bridge over the creek on the road which holds part of the creek’s course steady but it has definitely moved which, would be good information to know if you were farming that part of the land. For my purposes, it is horse pasture so it isn’t that big of a deal to me except for fencing purposes. O.k. so, what did this 13 year photographic history of my property tell me and was it useful? It told me several things. 1. Most importantly it told me the wooded area was new growth, specifically 9 year old growth. This was very important in my decision to purchase the land as I knew it was going to be me and my daughter clearing the land and having to cut down 1 foot diameter, 20 foot tall trees is worlds away from cutting down 3-5 + foot diameter, 50+ foot tall trees. 2. It told me that there was at least some fertile land on the property as evidenced by the garden. 3. It told me that the ‘boot’ shaped open area had existed, without trees, since at least 2009 and had existed with some trees since 2005. It also showed that the ‘boot’ had been in grass the entire time. 4. It told me that the storage garage was built between 2014 and 2018. All of this information factored into my desire to purchase the land and so was extremely important information. HOW THE PROPERTY LIES - CONTOUR Another very helpful piece of information that can be overlaid onto the property map are contour lines. In case you are not familiar with contour lines, they are lines that connect all points of the same elevation, thus show: 1. how steep or flat your property is, and; 2. how quickly that steepness or flatness occurs. So, if an area is steep the contour lines are going to be closer together. If an area is flat the lines will be farther apart. The lines will also show how quickly and in what direction the area gets steep or flat. Example: 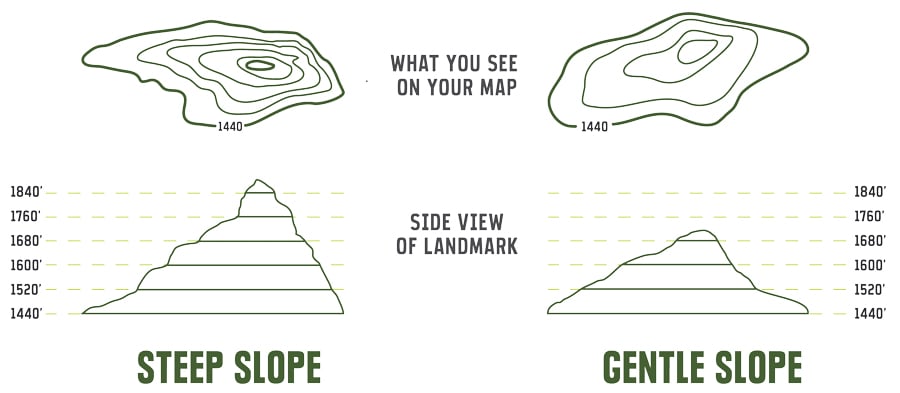
Maps that show land by its contours are called topography maps.
Unfortunately the contour lines on my GIS show up as white lines so that they are difficult to see. But, they show some very helpful information, information which again, helped me in my decision whether or not to purchase the property. Below is the property with the contour lines. 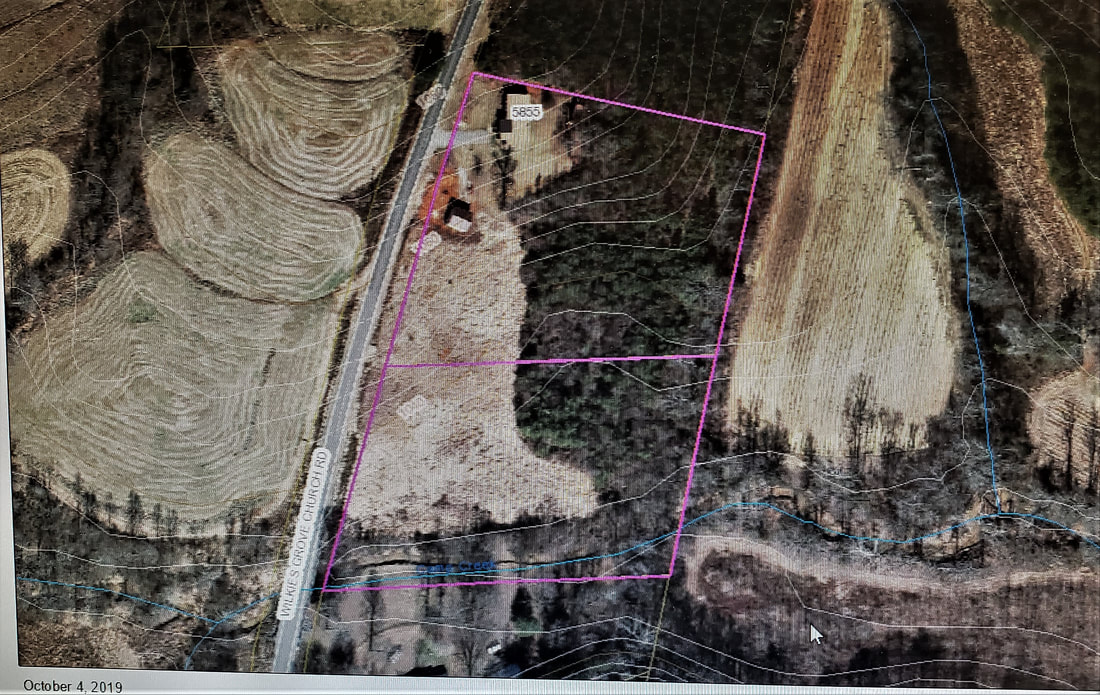
To make it easier to see and explain I have drawn some things on the picture (Picasso would be proud).
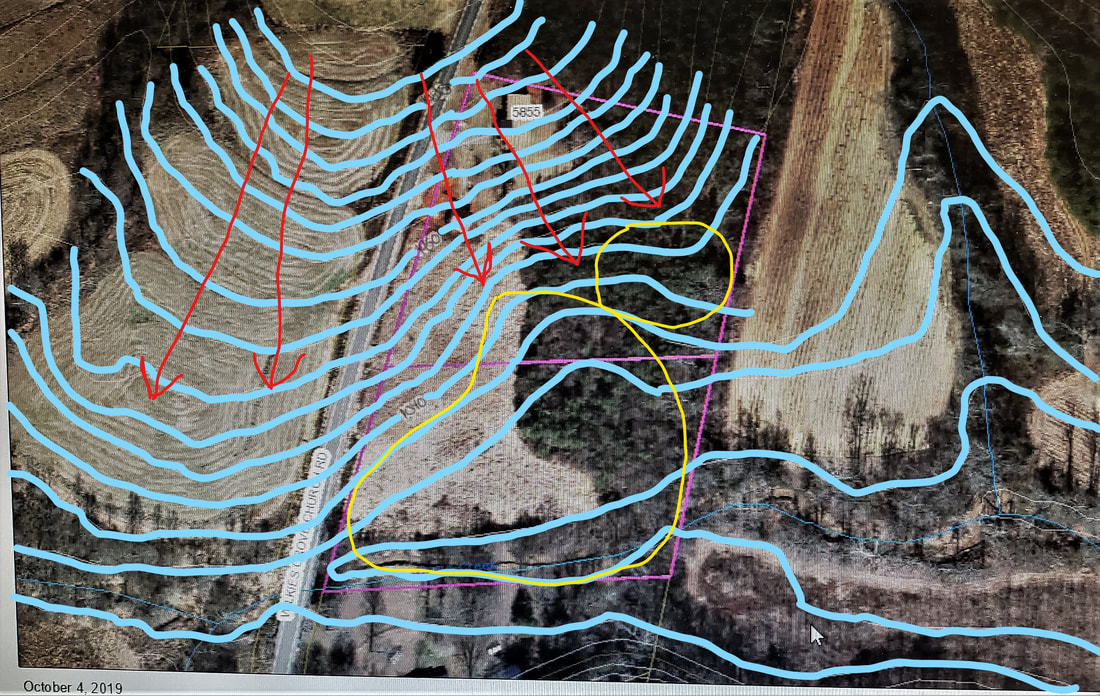
Ok, so the blue lines are the contour lines. The red arrows show how the land slopes in a general southwest direction towards the creek. The yellow circles are places of general flatness without much notable slope. There are 3 elevation points which are extremely hard to see, the first is in the ‘boot’, I have attempted to draw it on the picture. The elevation is 1,040 feet above sea level. The next elevation point cuts right through my storage garage, and is at 1,060 feet above sea level. The last goes through the tip of the top northwest corner of the property by the road and is 1,080 feet above sea level.
So, after looking at a bunch of lines, what we can determine from them? 1. The land starting in the northwest corner by the house slopes down to the southeast at a decent clip until you get about halfway down the property, then the contour lines start spacing out but, generally speaking the land continues to slope to the southeast. This definitely holds true. My house sits on a little hill, the hill runs down to the open land and back behind the house. 2. Starting at the elevation contour of 1040 the land begins to flatten out and gets flatter as it gets closer to the creek. The property on the western side is never flat except at the house and at the southwest of the property nearer to the creek, otherwise, as the contours show it slopes fairly gradually southeast. The property, as shown by the contours, is basically flat from the 1040 contour south. 3. From the north property line to the south property line the land falls 40 feet in a northwest (1,080 feet) to southeast (1,040 feet) slope. After hitting 1,040 feet, the land flattens out until it gets south onto my neighbor’s property where it begins to rise again. Basically I’m in what we southerner’s like to call a holler. This information was extremely important in my decision to even go see the property as I knew that I needed some flat land and was not going to consider property where the only flat land was what the house sat on. In fact, I was exceedingly pleased to find that the land had so much flat land. In our area, flat land is more costly by far than hilly, sloping land. SOIL COMPOSITION Another great feature of GIS is that you can see (in a basic sense) what soils make up your property. I will not lie; it is hard to interpret this depiction of the property because, for some unknown reason, the powers that be decided to use different shades of the same color to designate the different soils and the colors do not translate very well in my jpeg. 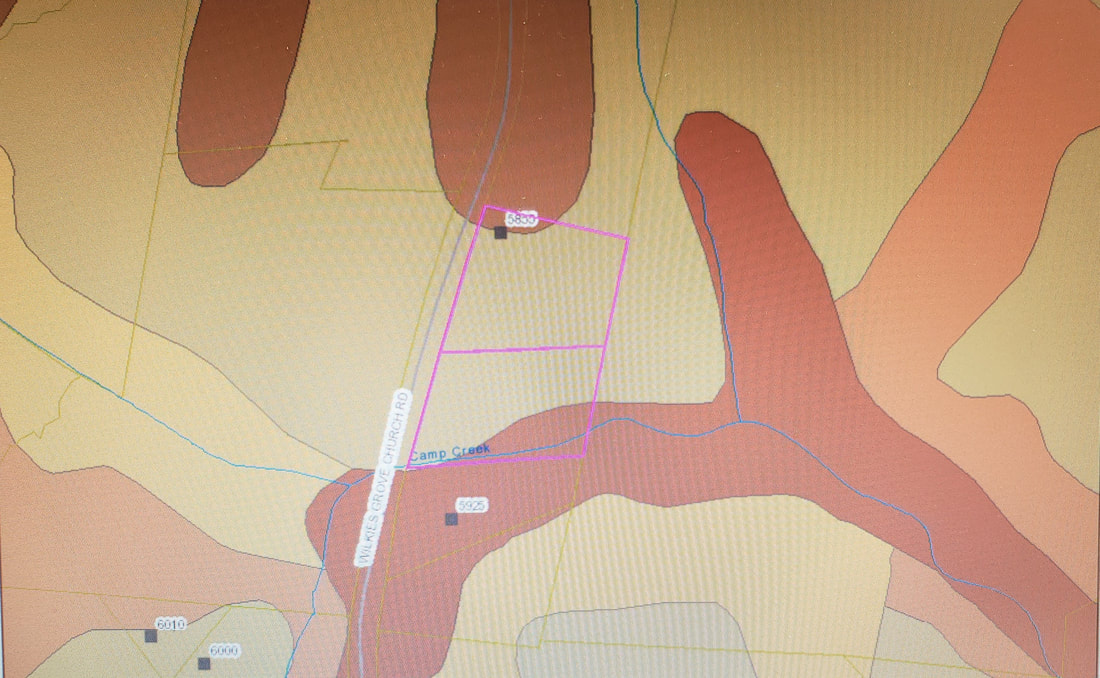
Even with the difficulty in knowing exactly what soil I have, I have narrowed it down to a hand-full because, when digging, the soil is red and then yellowish brown or, in some cases, vice versa, which, in all scenarios, means clay. To anyone familiar with western North Carolina this comes as no surprise. The interesting thing is the reddish brown coloring towards the southeastern corner of the property, near the creek. On this part of the property the water table is very close to the surface (about 3 feet) and we actually have a boggy area. The soil in this area is very organic rich and is a gray to black color when dug. It is also substantially easier to dig than the clay and is usually rock free.
MISC. FEATURES GIS also has other helpful filters including flooding hazards and zoning. I have found that each county’s GIS does vary so that some features may not be available in all areas, however, photographs, contours and soil composition I have found in all GIS that I have searched. CONCLUSION GIS is a great tool to assist in the purchase of new land or the use of existing land. Not only can you see what has happened to the land historically through photographs but you can determine how the land lays and even in a broad sense what is it composed of. Add that to knowing if it is at risk of flooding or has zoning issues and you have a solid tool to assist you but, as good a tool as it is, it does not replace boot on the ground investigation which is a must for purchasing new land or even opening up land you currently have to a new venture.
So you bought some land and now you want to farm that land, congratulations and welcome to the club. We need more of you.
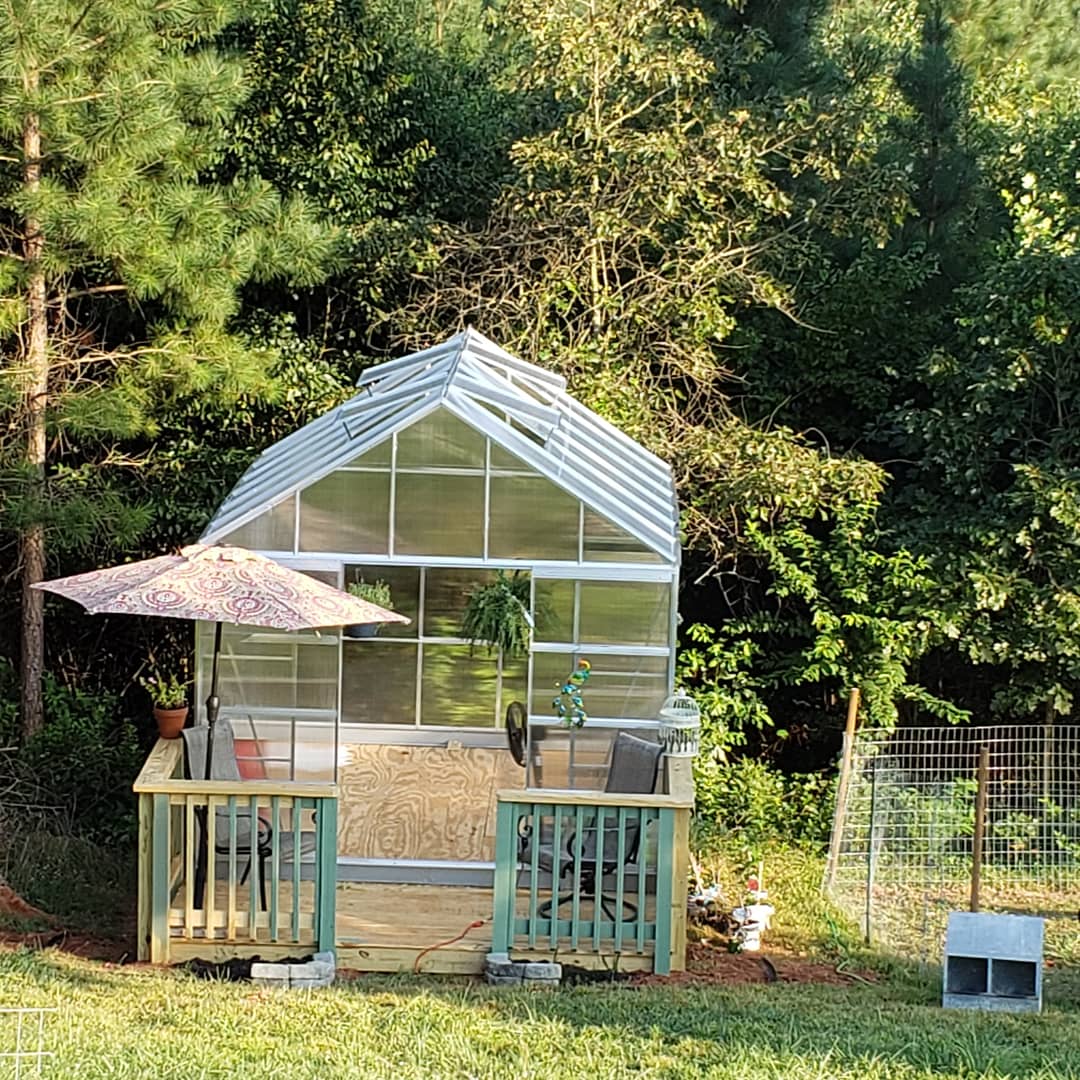
However, as you stand chest out glowing with pride as you look out over your new land you are suddenly riddled with self-doubt and the feeling of being adrift on the ocean with no land in sight. You want to farm, you want to be a Farmer but what does that really mean? It’s fine to talk about it in the abstract, “My goal is to be a farmer.” “My dream is to have land to farm.” But when it’s looking you in the face, when your dream has become a reality and that land, your land is waiting for you to take the helm and lead, it’s a whole new ballgame. How do you decide what you are going to farm? That is the subject of this post and it really should be one of the first, if not the first question to answer when looking at and purchasing land to farm. First of all, what does it mean to farm? Well if you look up Webster’s definition it is quite long as ‘farm’ has a lot of different meanings. In our context it means: to devote to agriculture; to manage and cultivate as a farm; to grow or cultivate in quantity; to engage in raising crops or animals. I am sure that when the decision to purchase land to farm was made, ideas already existed about what the land would be used for and what would be farmed. For example: a horse farm, a vegetable farm, a sheep farm, a goat farm, etc. Then you buy the land. It may be that you were able to decide how much land you might need to farm what you thought about farming and were able to buy that amount of land and it might be that, that land was already set up for just the thing you wanted to farm. That would be perfect. Unfortunately most of us don’t live in a perfect world. Most of us live in a world where any type of acreage is expensive so the amount of land, what’s on the land and where the land is located is usually dictated to some degree by how much money the land will cost vs. how much money we have to spend. For example, when I started looking for land I had some specific criteria. I wanted at least 10 acres, I wanted water on the property, I wanted some open land, I wanted some flat land, I wanted, at least part of, the land to be fenced and I wanted a barn of some sort. What I ended up with was 5.74 acres, about 2 acres cleared, a bit of flat land, water on the property, no fencing and no barn. My need for the things on my list were not dictated by what I wanted to farm, but the fact that I already owned four horses and two goats so I already had some very specific requirements. So, let’s say you are more in my boat and were able to get some of your wants but not all of them when you purchased your land. How do you now decide whether or not the ideas you had about what you were going to farm before purchasing the land are still feasible and, if not, where do you go from there? I will continue using myself as an example. Before purchasing our land, my daughter and I had thrown out several ideas/wishes for farming including horse barn, dairy goats, sheep and hogs. I have always been a horse person, always had horses and love having them. My daughter and I talked about having a lesson facility. With just shy of six acres, two open, it was not an impossibility to have a lesson facility, however, we had no fences and no barn. Fencing and barn costs would be in the tens of thousands of dollars. On to goats: In my zeal to farm I went ahead and purchased and bred a very good dairy goat herd which I kept at the barn I rented for my horses. Unfortunately does (female goats) are really, really good at escaping and going for jaunts around the property. The owners of the property had a large garden each year and, unfortunately, the garden and the goats didn’t mix so the goats had to go. I had a wonderful friend who let me keep the goats with her herd for almost a year in the hopes that the house I owned at the time would sell and I would be able to purchase land. It was not meant to be and I made the hard decision to sell my herd. From this experience I learned that, as much as I absolutely love goats, I did not want to get back into the goat business unless I had the perfect set-up and really good fences. Sheep was another idea my daughter and I had. We thought sheep would be a good multi-purpose animal in that we could use to harvest wool and have lambs to offer for sale and as meat. Sheep are not like goats. Sheep graze like horses and cows unlike goats who are browsers eating weeds, underbrush and such. With the sheep idea we came back to acreage and fencing. Hogs were actually all my idea (my daughter was never keen on them). I read some papers by Joel Salatin and thought his method of pig farming was intriguing. I also happen to like hogs, I think they are very cool creatures and found a couple breeds on the Livestock Conservancy that I was interested in breeding. Hogs graze and also browse and root. I have a lot of wooded area so I didn’t think this was a negative, however, it came back to fencing. You can see my process in working through the ideas we had for farming. The major players in the initial decisions were: 1. The amount of open land; and 2. Fencing. I knew fencing was not cheap, but I was completely unprepared for exactly how expensive fencing is. Clearing land was not as much of a concern. Our land had been logged ten years before we purchased it so the growth on the land was mostly young with the majority of trees being less than a foot in diameter. I’m not going to lie, at this point all of our ideas were tabled mostly due to the cost of fencing the land and I was more than a little bummed. We had wanted chickens for years. In the spring of the first year on our farm we found a person advertising 25 different breeds of chickens for sale. He was going to hold an open house. The chickens were $15 to $25 a piece and ready to go straight into the coop (no heat lamp or inside brooding). My daughter and I picked out the chickens we wanted, got in the car with our money and drove two hours to this man’s house with stars in our eyes just salivating over the chickens we were going to finally get. The open house started at 1pm. We got there at 1:15pm. There was already about twenty or so people in front of us, people had already come and gone and, people showed up after us as well. We waited in the line for an hour as the man took his time with each person showing them the birds. Finally a buyer came out of the shed and said he was out of birds, that he only had about 5 birds left. There were still more than five people in line in front of us. We waited another five minutes and the man came out and confirmed that he only had 5 more birds. My daughter and I left immediately. I was beyond put out. In fact, I was so upset we drove straight to Tractor Supply and bought 4, day old chicks and all the brooding equipment we needed to set them up inside. May be not the best reaction but I had been waiting years (literally years) for chickens and darn it I was gonna have them that day. I’m happy to say all of our TSC chicks lived and are awesome birds. The point of the story is that we now had a brand new idea. What this man did was order day old chicks from a hatchery and raise them until they were 8 weeks old. Then he sold them for a really nice profit. That tidbit of information set off a lengthy discussion between my daughter and I of the possibility of doing the exact same thing as there didn’t seem to be anyone in our area offering this service. We reasoned that, based on the amount of people at the open house and the fact that he had taken orders on-line for pick-up the day before (a fact he listed but neglected to say that 90% of the birds had been sold before the open house) led us to the conclusion that there were enough people like us willing to pay a much higher price for: 1. More exotic birds; and 2. Older birds ready to go straight in the coop; that this might be a legitimate idea for our farm. This chicken idea is still on the top of our farming list. It has been tabled for the moment as we will need to build a suitable shed to raise the chicks. As our first year at the farm rolled on, we became very interested (obsessed really) with plants. This really happened when we discovered the discount section at Lowes Hardware. Suddenly we could get $20 plants for $1, take them home, water them and, usually, end up with some beautiful plants. This plant craving naturally led to succulents and indoor plants, few of which ever go on sale. If you have ever shopped for succulents or indoor plants then you know how expensive they are. My daughter really became obsessed with succulents, buying books, buying plants, starting to try to propagate them. This is when we started floating the idea around of starting a nursery. After all, if the big box stores could offer a succulent for $10 we could offer the same succulent that we had propagated for $5. It was an idea we both completely supported. We decided to get a greenhouse and with the help our family the greenhouse became reality and the nursery idea is the first not to be tabled. So, why did I share all of that with you? Simply to illustrate the pros and cons process that you need (have) to go through in order to find the ‘what’ that you are going to farm. And to show you that it can be a long and frustrating process but also that ideas will present themselves to you just in doing the things that you love and that interest you. It is helpful to keep a pros and cons table so you can add ideas to it as you go and as your land develops and changes. Below would be my example. IDEA PROS CONS Lesson Barn Working with horses, teaching riders, Fencing cost, barn cost, insurance showing potential, income potential cost Dairy Goats Income from selling stock and dairy Fencing cost, dairy equipment, products lots of market competition Sheep Income from selling stock, wool, meat Fencing cost, barn cost, unsure of local market Hogs Income from selling stock and meat Fencing cost, trailer cost, potential damage to land, unsure of local market Raising pullets Income from selling stock Shed cost Nursery Income from selling stock Unsure of market, cost of foundation stock There is no book, no golden rule about how to decide what you are going to farm. Get to know your land, get to know yourself and you will find that idea that fits both. |
AuthorMother and daughter team taking on the dream and challenge of farming. Archives |


 RSS Feed
