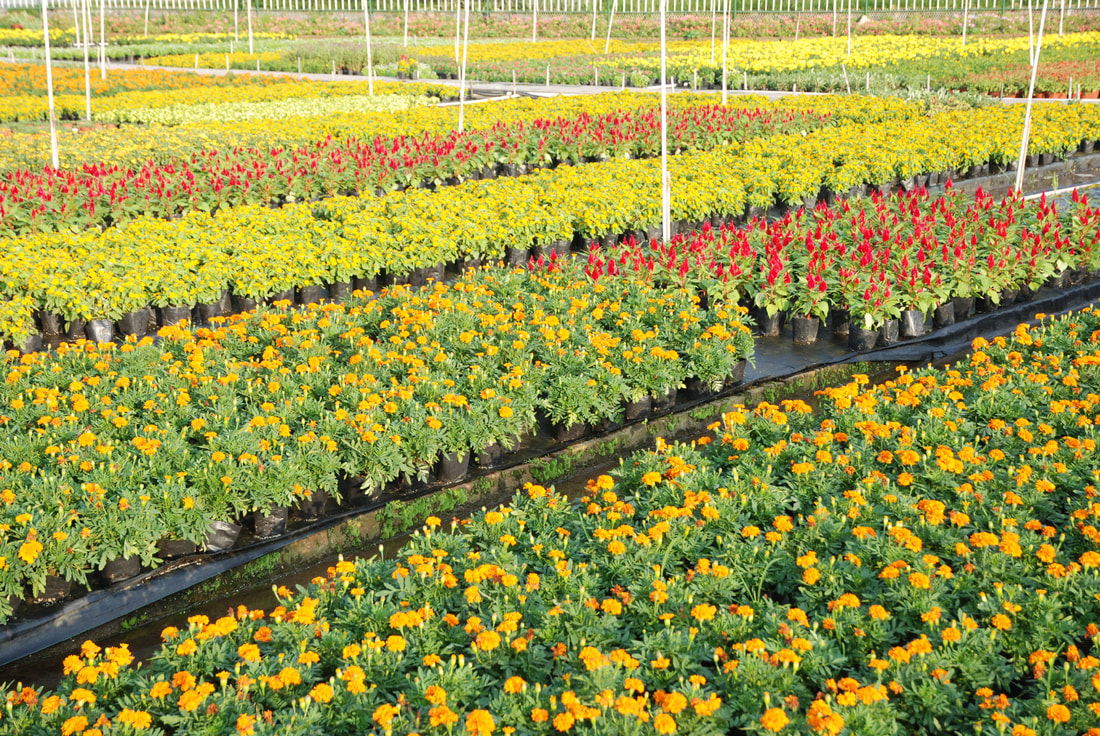
It’s the end of October, fall is setting in and you think you will finally get a break after a long spring and summer on the farm. Well, go ahead and take the break – you’ve earned it and you need it – but, don’t make it too long because in just two short months (or less) it’s time to start next year’s seeds. Yes, as head scratching as that sounds, if you are planning to sell transplants next spring, October is the time you are getting your germination area ready, organizing the greenhouse so you’ll have room for all the seedlings, making sure you have enough flats, starting mix and heat mats; and ordering seeds. So, what exactly is involved in selling transplants? 1. First you need to make sure you can legally sell plants. If you read my How to Start a Nursery blog, you can answer this question. 2. Second you need to decide what kind of transplants/starts, are you going to sell. Your answer to this question will likely determine when you start the germination process. For example: If you want to sell vegetable transplants at the local farmer’s market in the spring, odds are you are going to begin germinating the vegetables in late December or early January. This is, of course, dependent on your location. I am in Western North Carolina (Zone 7). Our last frost date is around April 14. One of our farmer’s markets opens at the end of April and the other at the beginning of May. The local box stores start receiving spring plants as early as the middle of March and most people have the planting bug by the middle of April. In order to meet a late April/early May selling date, the seeds need to be started in late December or early January, that way you have a plant that is strong enough to cope with transplantation shock and ready to be set outside.
3. Third you need to get your germination equipment ready. There are a lot of different ways to germinate seeds. If you are going to be selling the seedlings then you need to think about the most efficient way to germinate a lot of seeds. Don’t go overboard the first go around but calculate in for failures to germinate.
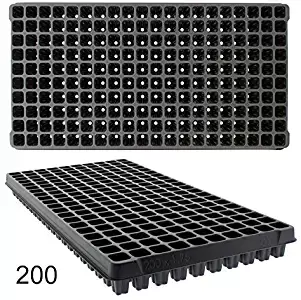
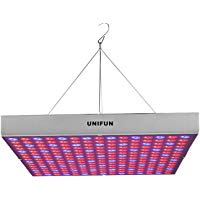
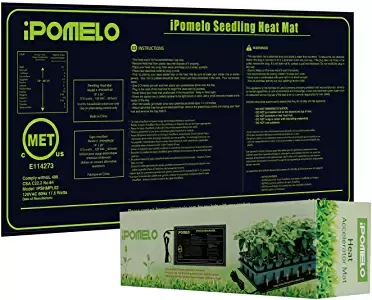
That being said, seed flats are probably the most efficient option. You can get flats from 50 cells to over 200 cells. Or you can get row trays. This is a personal choice for the grower. If you get cells, keep in mind that different plants require different sizes. For instance, small plants like broccoli and lettuce can be started in 1 to 1.5 inch cells whereas tomatoes and peppers need 1.5 to 2.5 inch cells. You are going to need a heat source. There are several options, but the two most widely used are grow lights and heat mats. Again, this is a trial and error choice based on your individual experience. You may end up using both. You need to have a space for the trays and for the individual pots and/or flats (like a 4 cell flat) that the seedlings will be transplanted into to stay until sold.
4. Fourth you have to decide how many of what seed you are going to plant.
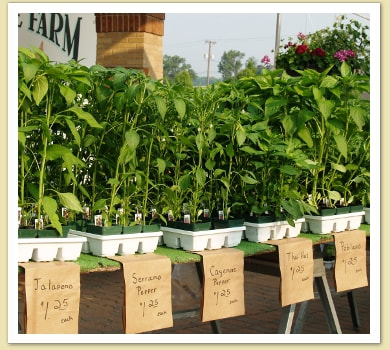
There are a lot of variants on these decisions and a lot of the variants are personal. However, I will make a few points of reason for you to consider when contemplating these decisions. 1. Do you want to sell vegetables, fruits, flowers or a combination? This question really ties into the ones below. If you are going to sell transplants as a business and not just because they are leftover seeds from your own garden transplants then you have to consider your local market and what will actually sell vs. what you would like to grow. 2. What does the market want? Fortunately, people have really embraced home gardening whether they have a patio garden, 1 or 2 raised garden beds or a ½ acre plowed row garden they want to grow at least some of their own vegetables. People also love flowers. Go to a box store on a warm spring Saturday and watch people grab up the early annual flowers – that first burst of color after the dull winter. If you are going to sell transplants as a business, you need to know what your market wants and what it can support. If your main selling outlet is going to be the local farmer’s market then you need to know if anyone else is already selling transplants, if they are, what are they selling; are they meeting or exceeding demand; is there going to be room for you. If you determine there is room for you and/or if you are selling on some other platform, what are people buying? Vegetables are always popular and there is a strong market for transplants (again, go hang out at the local box store). Your major veggies are tomatoes, peppers, cucumbers, broccoli, lettuce and squash. Your major herbs are basil, oregano, thyme, rosemary and mints. 3. Why are you planting a certain seed? This was touched on above. If this is a business, you need to plant what is going to sell. You may be head over hills for a rare heirloom tomato but if no one has ever heard of it and you can’t let them see it and taste it, more than likely they are going to buy the better boy because they know it – it’s safe. Sell what your market knows – give them the better boy and the early girl and then throw in a few curve balls. If you can give them something safe and familiar they are more likely to buy something that is not because, if it doesn’t work out, they still have their safe and familiar. 4. How much product can you handle? You need to be honest with yourself on this one. Growing anything is labor and time intensive. 500 little seedlings in a seed flat doesn’t seem like a lot, until you have 500 3” pots. 
Plan ahead, be honest with the amount of room you have and the amount of time you have to spend on caring for the seedlings and consider the following:
a. It is likely that you will lose a quarter to a half of the initial number of seeds you plant; b. It is going to take between 1 and 2 weeks to germinate the seeds and then they will need to be moved into individual pots (or whatever they are going to stay in until sold) when they get their true leaves about a month after germination. This means that you can start a new set of seedlings every 5 to 8 weeks. So, as long as you are selling your product, you can have a constant stream of germinating seedlings and transplants. This might affect your decision on how many seedlings to plant and how many plantings you want. c. How many plantings do you want to offer? In my neck of the woods, you can plant in spring, summer and fall. In fact, people are still planting in October for overwintering and cool season veggies like broccoli, lettuce, etc. If you decide to offer at different seasons this could affect the type of transplants you offer, for instance, offering lettuce in 100°F heat is not the wisest decision. Know your plants, offer heat tolerant plants in summer (peppers and tomatoes are always good). Spring and Fall are a bit of a gray area (at least where I live). In the Spring you want to offer all of your veggies, of course. Make sure the ones that don’t tolerate the heat well are offered in enough time to be harvested before the real heat sets in. In early Fall you can still offer the heat loving plants, just make sure that they will mature to be harvested before the first frost. As temps cool down in Fall, offer those cool weather plants again.
5. Put together a selling portfolio. What in the world is a selling portfolio? It is your list of markets you are going to sell to, whether that market requires an application or any payment, the first day you are going to sell to that market, the last day you are going to sell to that market, if you have to be physically present to sell, if so, from when to when and, what products are going to be sold in that market.
Example: 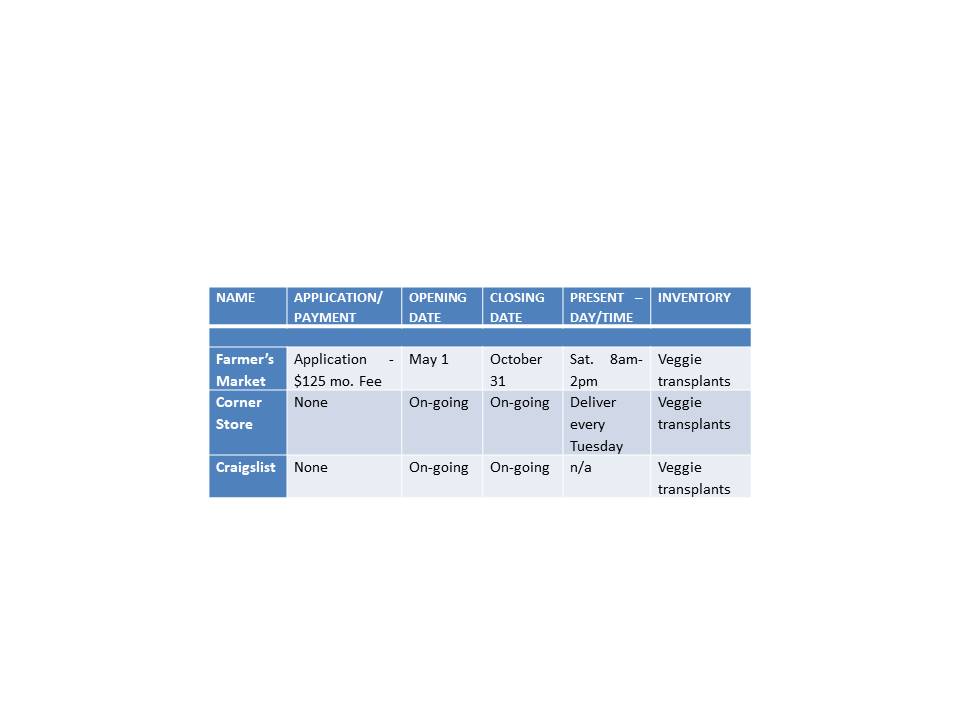
You should make one of these initial sheets for each year or even each season – depending on how and what you are selling.
After you have gotten this initial portfolio sheet done, have an individual portfolio sheet for each market so you can track inventory, sales and costs by date and market to determine if you are making a profit in that market. Example: 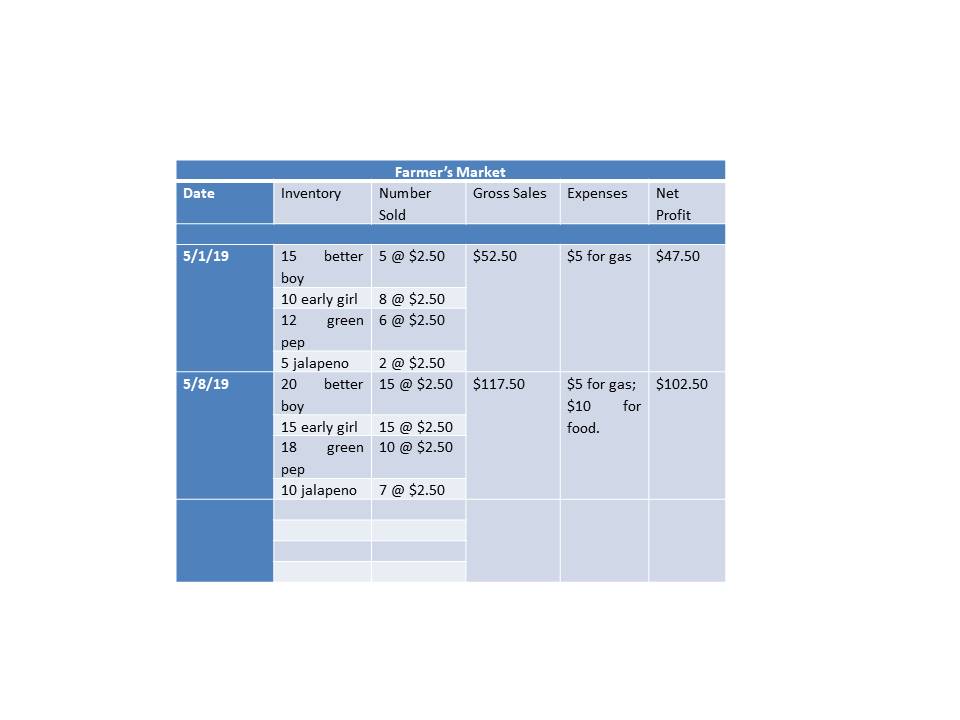
This sheet will only include expenses incurred while at the market, not expenses incurred on the farm for the production of the transplants – that is another sheet (I’ll do a blog with a Farm Niche Portfolio to assist).
Keep these records up-to-date and accurate. At the end of the selling season or every quarter if there is no selling season review the data to make sure that selling in a particular market is profitable. If so, keep doing it, if not get out. If it’s on the fence, see if there is a way to push it to the profitable side like offering a new product for sale. 6. Market your product. At minimum you should have a website and a Facebook account. There are other social media platforms that are helpful as well including Pinterest, Instagram and Twitter. You should also be gathering email addresses and emailing regular newsletters including where your products are being sold, what products you have to offer, the price and the date the product will be available. Fortunately or not, we have to bring our farms into this century, jump on the social media bandwagons and promote the heck out of ourselves - because no one is going to do it for us – and the major competition to farms are box stores which will be more than happy to see us fade into obscurity. 7. Sell your product. This is going to be the most important thing you do, of course, but not only from a financial standpoint. Selling your product opens the door for you to meet and get to know your clientele – you need to take full advantage of this. They will let you know if you are offering the right products, if you should offer additional products or take a product down, etc. 
Selling transplants can be a successful selling niche to open on the farm just make sure you prepare, plan, work, promote and sell.

0 Comments

So, as you can see, unless you are going to sell annuals, cut flowers, seeds, plants without roots or indoor perennials you are going to be selling nursery stock and will need a license.
There are 3 categories of licenses: 1)registered; 2) certified and; 3)institutional. Registered is a nursery of 1 acre or more and sells only inside the State, certified is a nursery of 1 acre or more and sells inside and outside the State and institutional is a government owned or operated nursery. You can also be a nursery dealer, meaning that you don’t grow or collect the plants, you purchase them from someone else and sell them. If you collect plants, you have to get a collected plants certificate which states that you have not collected any plants in violation of the plant pest regulations. OK – That is a lot of information, however, it really boils down to 2 decisions – are you going to sell outside of the State? And, are you going to grow your own plants or buy them from someone else? Once you answer those two questions, you know what kind of license you need. The State charges a fee for each license and requires an inspection of the nursery. If you are going to have a registered license the nursery is inspected every 3 years. If you are going to have a certified license, the nursery is inspected every year. 2. If you are going to grow your own plants, you need to know about Plant Patents. There is a federal law – 35 United States Code 161 – that allows people to patent plants. What does that mean? It means: The Government grants a patent to someone who has invented or discovered and asexually reproduced a distinct and new variety of plant, other than a tuber propagated plant or a plant found in an uncultivated state. The grant, which lasts for 20 years from the date of filing the application, protects the patent owner’s right to exclude others from asexually reproducing the plant, and from using, offering for sale, or selling the plant so reproduced, or any of its parts, throughout the United States, or from importing the plant so reproduced, or any part thereof, into the United States. In order to patent a plant: The subject matter of the application would be a plant which is developed or discovered by the inventor, and which has been found stable by asexual reproduction. To be patentable, it is also required: · That the plant was invented or discovered in a cultivated state, and asexually reproduced. · That the plant is not a plant which is excluded by statute, where the part of the plant used for asexual reproduction is not a tuber food part, as with potato or Jerusalem artichoke; · That the inventor named for a plant patent application must be the person who actually invented the claimed plant, i.e., discovered or developed and identified or isolated, and asexually reproduced the plant; · That the plant has not been patented, in public use, on sale, or otherwise available to the public prior to the effective filing date of the patent application with certain exceptions; · That the plant has not been described in a U.S. patent or published patent application with certain exceptions; · That the plant be shown to differ from known, related plants by at least one distinguishing characteristic, which is more than a difference caused by growing conditions or fertility levels, etc.; and · That the invention would not have been obvious to one having ordinary skill in the art as of the effective filing date of the claimed plant invention. What exactly is asexual reproduction? Asexual reproduction is the propagation of a plant without the use of fertilized seeds to assure an exact genetic copy of the plant being reproduced. Any known method of asexual reproduction which renders a true genetic copy of the plant may be employed. Acceptable modes of asexual reproduction would include but may not be limited to: rooting cuttings, divisions, layering, grafting, budding, bulbs, slips, rhizomes, corms, runners, etc. Again, a lot of information. What does it mean? Well it means a few very important things to someone wanting to sell plants. First it means that you can’t sell a plant if someone has a patent for that plant without their permission or it’s a crime. Second, you can’t patent a natural, uncultivated plant. For example, you can’t patent a white pine tree. Why? Because it grows in nature, uncultivated. A great example of where plant patents are prevalent is with roses, tulips and irises. 
So, how do you know if a plant is patented? Anyone who sells a patented plant is supposed to have it labeled with PP (plant patent) and the patent number like the image below.

You can also see on this label it specifically says "propagation prohibited".
The name also includes "hybrid". Any hybrid should be an immediate red flag for you to check out whether or not it is under patent. You may also see PPAF – this means “plant patent applied for”. Another red flag is PBS or PIP. Basically groupings of letters on the label starting with a “P” should be a red flag for you. A plant name can also be trademarked ™ which is another a red flag because, at some point, it has been patented. Remember – the patents are good for 20 years so a TM does not always mean the plant is still off limits. It is the grower’s/seller’s responsibility to determine whether or not a plant is patented. Ignorance cannot be pled as a defense. 3. Decide what you are going to offer for sale. This might be the hardest thing you do. Do you grow vegetables, indoor plants, succulents, shrubbery, trees, or all of the above? My advice is to grow what you are interested in and what you think you can sell (maybe not in that order) and don’t go overboard. It’s not a bad thing to start small and build. If you are unsure, watch trends. Right now succulents and indoor plants are booming. Annuals are always a hit. So are seasonal plants, like the fall mums. 4. Decide if you are really up for the task. Having a nursery sounds exciting and fun and almost meditative. The reality can be and often is quite the opposite. Plants require lots of care. They have a variety of needs including moisture, nutrients, pest and fungus control, sunlight and temperature. You have to figure out their needs and then meet them and that can take a lot of time and work. If you have decided to grow your own plants, that adds another layer of care and work to the equation. Seeds can be fickle and hard to grow and even when they germinate the resulting plant may not thrive. Rooting is hard and takes a lot, a lot of practice and attention and even then has a high rate of failure. It’s the same with cuttings and generally any other type of propagation. I’m not saying this to be a Debbie downer or to discourage a would-be gardener. I simply want the blinders to be off so that when you make the decision to include a nursery in your farm or homestead you are ready to devote the time and attention needed for it to be successful. With the right planning and some good ole fashioned work, a nursery can be a great addition to a farm or homestead and a source of steady income. 
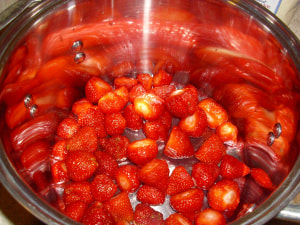
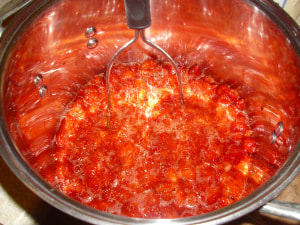
Strawberry jam is one of the easiest things to make and can and, of course, its delicious and home canned items are a hit for gifts as well. Step 1: What you need: Strawberries, Sugar, Jars and Lids. I used 2 quarts of strawberries and 5.5 cups of sugar. Step 2: De-cap the strawberries, put them in a colander and wash them off. 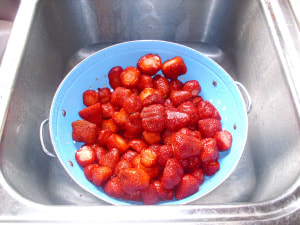 Step 3: Get a large pot. Put a layer of strawberries in the pot and mash them up with a potato masher. keep adding strawberries and mashing them up until they are all in the pot.
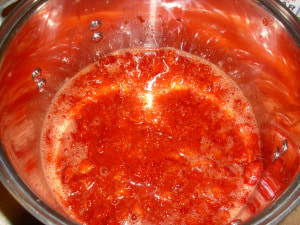
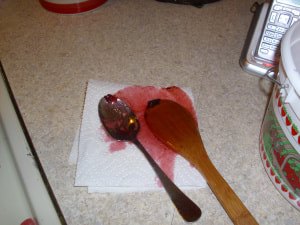
Step 4: After all the strawberries all mashed up, add 5 1/2 cups sugar. 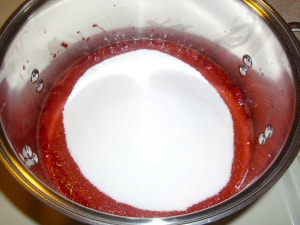 Step 5: Bring the mixture to a boil slowly, stirring it so that the sugar dissolves. 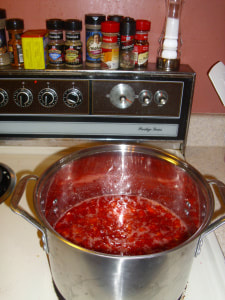 Step 6: When the mixture initially boils, it will rise a lot and get very foamy on top. Skim the foam off the top and discard it. You won't be able to get all the foam so don't get too overwelmed trying to but get as much as you can initially and then just every now and again skim the sides. 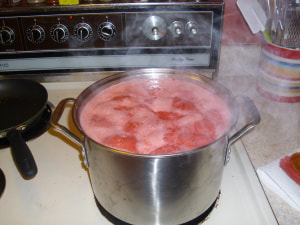 Step 7: After about thirty minutes at a rolling boil, the mixture starts to thicken and eventually begin to gel. You can see that the wooden spoon I stir the mixture with and the metal spoon I use for skimming and testing the gelling of the mixture have dark red globs on the ends. As your mixture starts to gel, some of the gel will begin to stick on the ends of your spoons. A good sign you are getting close.
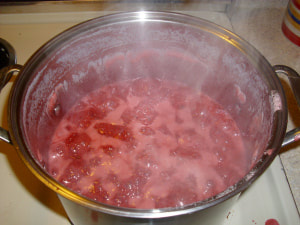
Step 8: Stir the mixture and test with a spoon often until you get a gelling consistency that you like. The mixture should not be runny but more like molasses or thick honey coming off the spoon.
You will notice throughout the process that your mixture will decrease in volume and the bubbles will go from light airy bubbles to heavy thick bubbles as the jam gells. It may be hard to see in the above picture but the bubbles are very heavy and makes me think of bubbles you would see lava make at a volcano. Random maybe but the viscosity is similar. Step 9: Make sure your jars and lid have been sanitized. The easiest way to do this with the jars is to put them in the dishwasher and wash them. You can also simmer them in a pot of boiling water. Make sure you simmer your lids so they seal properly. The lids should simmer until they are used. Step 10: After you have the mixture at a consistency you like, take it off the heat, ladle it into your jelly jars and cap. Let your jam rest overnight. Word of caution. The process is very simple and it is very easy to get overly confident. When I made this jam, I had previously sanitized the jars and lids and my Mother had said that I didn't need to put the lids in the simmering bath as I had previously done so, I used room temperature jars and lids. The result, the lids did not seal properly. After an hour of waiting for the lids to seal, I started a hot water bath and put the jars in that for 15 minutes. The end result, most of the jars sealed but I have about 4 that did not. To check your lids for a seal you can listen for the very distinct popping of the seal or, you can also run your finger over the lids, if it is sealed it will feel level or slightly depressed in the center, if not sealed it will be slightly raised. Lesson learned: Don't get cocky and always heat your lids. |
AuthorMother and daughter team taking on the dream and challenge of farming. Archives |


 RSS Feed
